ENG-12
Chapter 2
CONNECTIONS
Choosing a Connection
The following shows examples of connections commonly used to connect the DVD player with a TV
and other components.
Before Connecting the DVD Player
- Always turn off the DVD player, TV, and other components before you connect or disconnect any
cables.
- Refer to the user’s manual of the additional components (such as a TV) you are connecting for
more information on those particular components.
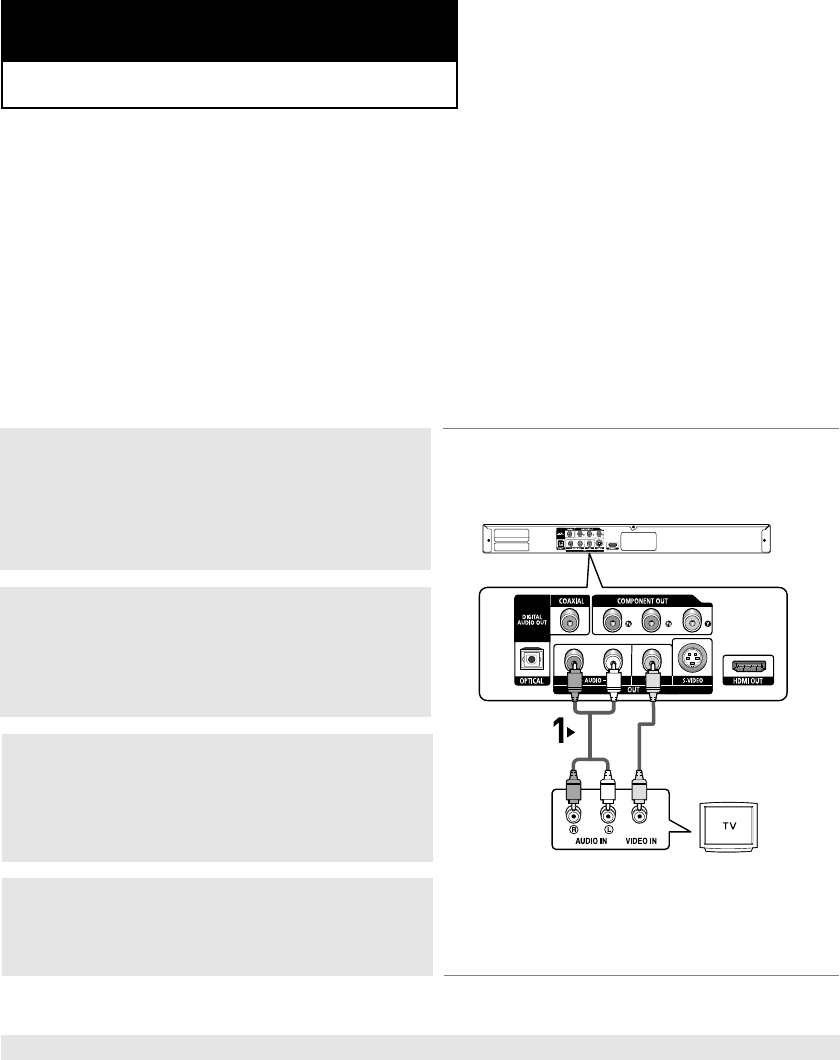
Connection to a TV (Video)
1
Using Video/Audio cables, connect the VIDEO (yellow)/AUDIO
(red and white) OUT terminals on the rear of the DVD player to
the VIDEO (yellow)/AUDIO (red and white) IN terminals of
your TV.
2
Turn on the DVD player and TV.
Note
- Noise may be generated if the audio cable placed too close to the power cable.
- If you want to connect to an Amplifier, please refer to the Amplifier connection page. (See pages 18 to 19)
- The number and position of terminals may vary depending on your TV set. Please refer to the user's manual
of your TV.
- If there is one audio input terminal on the TV, connect it to the [AUDIO OUT][left] (white) terminal of the DVD
player.
- If you press the VIDEO SEL. button when DVD Player is in stop mode or no disc is inserted, the Video
Output mode changes in the following sequence: (S-Video
➝ I-SCAN ➝ P-SCAN).
When HDMI is connected, only P-SCAN can be operated, S-Video and I-SCAN cannot be operated.
- If you set the HDMI output resolution to 720p or 1080i, the S-Video outputs will not output video.
RED
WHITE
YELLOW
RED
WHITE
YELLOW
Audio Cable
Video Cable
3
Set the Video Output to S-Video in the Display Setup menu.
(See pages 52 to 54).
You can also use the VIDEO SEL. button to change the Video
Output mode. (See page 12)
4
Press the input selector on your TV remote control until the
Video signal from the DVD player appears on the TV screen.


