2
2. Plug the other end of the cord into a
wall plate jack.
3. Align the base’s keyhole slots with the
wall plate studs and slide the phone
downward to secure it.
4. To mount the phone directly on a wall
(after mounting the phone on a wall
plate), drill two holes 3
1
/4 inches
(83 mm) apart, one below the other.
5. Thread a screw into each hole, letting
the heads extend about 5mm from the
wall.
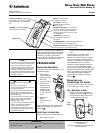
CONNECTING THE HANDSET
Plugoneendofthesuppliedcoiledcordinto
the handset’s modular jack. Then connect it
to the jack on the left bottom of the base. Ô
SET UP THE PHONE
1. Hold down both UP and DOWN for about
four seconds until
ENTER LANGUAGE,then
ENG ESP FRA appear, with ENG flashing.
2. Press
UP or DOWN to select the desired
language, then press
DELETE to
confirm.
LCD CONTRAST and 1 2 3 4 5
appear on the display, with 3 flashing.
3. Press
UP or DOWN to select the
contrast level (1-5), and press
DELETE
to confirm. ENTER AREA CODE appears,
then
_ _ _ appears, with the first _
flashing.
4. Press
UP and DOWN to select the first
number of the area code, and press
DELETE to confirm the selection.
5. Repeat step 4 to set the second and the
third digits.
SETTING THE RINGER
If you do not want to hear the phone ring,
slide
RINGER to OFF.Youcanstillmake
calls with the ringer off, and you can still
answer calls if you hear another phone on
the same phone line ring. If you want to hear
the phone ring, set
RINGER to HI or LO.
SETTING THE DIALING MODE
Slide TONE/PULSE to the setting for the type
of service you have. If you are not sure
which type you have, do this simple test.
1. Slide
TONE/PULSE to TONE.Liftthe
handset and listen for a dial tone.
2. Press any number except
0. If your
phone requires that you dial an access
code (
9, for example) before you dial an
outside number, do not press the
access code number.
• If the dial tone stops, you have touch-
tone service. Set the switch to
TONE.
• If the dial tone continues, you have
pulse service. Set the switch to
PULSE.
USING SPECIAL TONE
S
ERVICES
Some computer services require tone
signals for communications. If you have
pulse service, you can still simulate special
tone service by following these steps.
1. Connect to the special service using
pulse dialing.
2. When the special service answers,
press * to temporarily switch to tone
dialing.
3. When you complete the call, hang up
and change the setting back to
PULSE.
USING THE MASTER/
S
ECONDARY SETTING
M/S (Master/Secondary) lets you easily
connect up to four system modules to the
same phone line, so CID and Call Waiting
information can be set to more than one
phone on that line.
1. Slide
M/S to M.
2. Slide
M/S on all (up to three) other
systems to
S. Ô
3. Set one system to answer; set the
others to off.
OPERATION
MAKING A CALL
1. Pick up the handset and wait for a dial
tone.
2. Use the keypad to enter the number
youwishtodial.Thenumberappears
on the display. Ô
3. When you complete your call, hang up
the handset. A few seconds later, the
number disappears, and the display
returns to normal.
RECEIVING A CALL
When you receive a call, the phone rings
and the
NEW indicator flashes. CALL# and
the caller number appear on the display. To
answer the call, pick up the handset. Ô
TIMER
This phone is designed with a clock timer to
count the off-hook time in seconds, up to
one hour. The timer appears on the display
and starts to count up when you dial a
number or answer an incoming call. Ô
USING FLASH
FLASH performs the electronic equivalent of
a switchhook operation for special services,
Ô NOTE Ô
Connecting the Handset
Your local RadioShack store sells a variety of
longer coiled handset cords, which are
especially useful when you mount the phone
onawall.
Using the Master/Secondary Setting
• If M is not set on at least one or more
phones, incoming calls might be
disconnected.
• If you connect only one system to a phone
line, set M/S to M.
• You can also connect other CID modules
that do not have the Call Waiting function to
the same phone line as your system, as long
as you do not connect more than four CID
modules total (including this phone).
• If you connect another type of CID module
that has Call Waiting (other than this system)
to the same phone line as your system, the
Call Waiting signal might be garbled or not
received.
Making a Call
If you dial a number over 15 digits, only the last
14 digits appear on the display.
Receiving a Call
• The NEW indicator remains flashing until
you have reviewed all new calls.
• The number of new calls does not change
until all calls have been reviewed and
END OF
NEW CALL
appears. The system new call
counter then resets to
0.
Timer
If you lift the handset and don’t dial a number,
the timer appears and starts to count up after
10 seconds.