Chapter 2 Installing StorNext File System
Installing StorNext File System on Windows
StorNext 3.5 Installation Guide 28
• Manually configuring the TCP/IP information, which disables
DHCP. You should use this method if any static IP addresses have
been configured.
• Editing the Windows registry to disable automatic IP address
configuration but not disable DHCP. To use this method, follow the
procedure outlined in Microsoft article 220874 available here:
http://
support.microsoft.com/kb/220874.
Removing a Previous
Version of StorNext 2
If a previous version of StorNext older than version 3.0 exists on the
system, you must remove it before installing the new version. If you are
upgrading from a version of StorNext newer than version 3.0, the old
client configuration is retained so there is no need to restore the old
configuration.
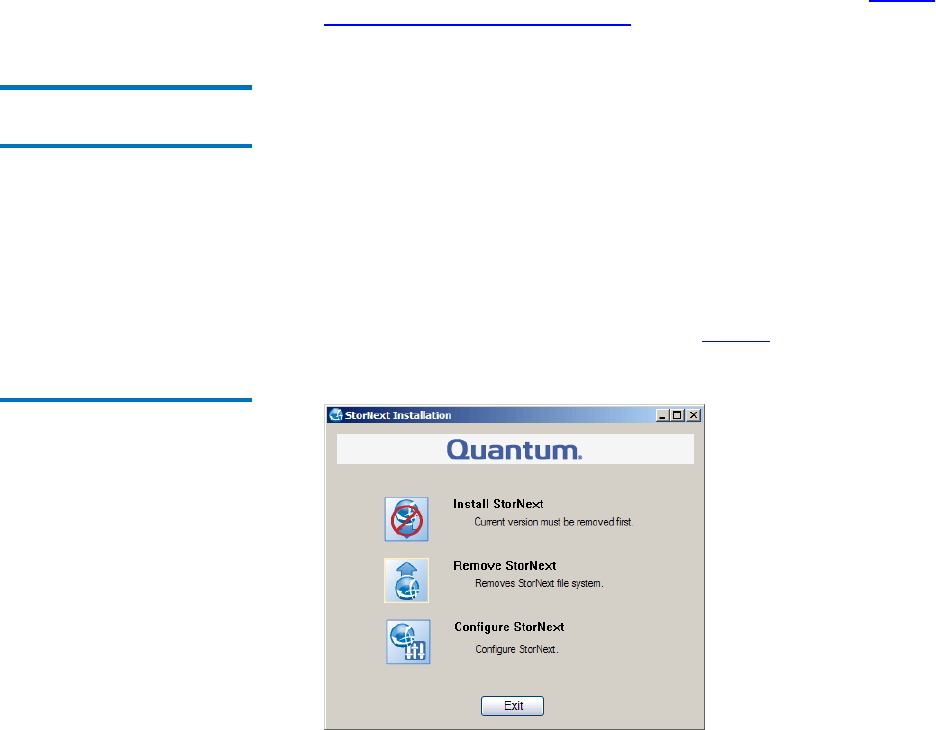
1 Insert the StorNext installation CD.
2 Browse to the root directory of the installation CD and double-click
the file
SnfsSetup64.exe.
The StorNext Installation window appears (figure 8).
Figure 8 StorNext Installation
Window: Remove StorNext
3 Click Remove StorNext.
A dialog box appears informing you that the current client
configuration has been saved.


