Operating
43
Operating
4
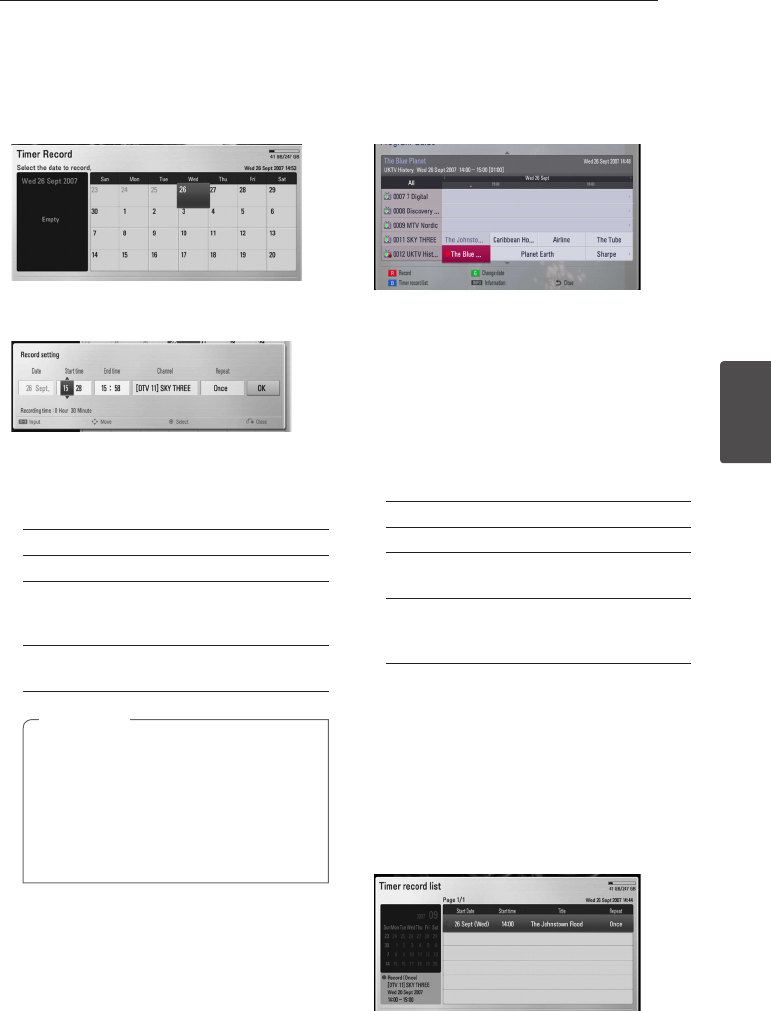
Timer Recording (Manual)
You can set the timer for a total of 32 programmes,
up to 22-28 days in advance.
1. While watching TV, press TIMER REC.
2. Use
W/S/A/D
to select the date to record,
and press ENTER (
b
).
3. Select an item using
A/D
and adjust it using
W/S
. You can use numbered buttons to
change the setting.
The adjustable items are listed below.
Start time Sets the start time.
End time Sets the end time.
Channel Sets the programme position.
(If you want to display more
channels, press CH LIST)
Repeat Choose a desired repeat mode.
(Once, Daily, Weekly or Mon-Fri)
y
The timer recording can be set from 3
minutes after the current time.
y
Timer recording is not available on a USB
device.
y
The timer recording is set up to 2
channels at the same time.
,
Note
4. Press ENTER (
b
).
5. Select [OK] then press ENTER (
b
).
If you input the wrong information, an error
message will appear and the timer recording
cannot be made.
Timer Recording (EPG)
You can also set the timer based on the information
provided by the EPG.
1. While watching TV, press GUIDE.
2. Use
A/D
to select date field, and select the
date of recording schedule using
W/S
.
3. Use
A/D
to select programme field, and set
the programme using
W/S
.
4. Use
A/D
to select the programme list, and
select a programme you want to record using
W/S
.
5. Select a program then press (R) color button.
The options for timer recording will appear.
[Simple] – Records only the selected program.
[Series] – Records the programs in a series.
[Split] – Records the subsequent parts of
events which are split.
[Recommend] – Records the program is
recommended by broadcaster as a link for
current series.
6. Select an option then press ENTER (
b
).
For the successfully scheduled programme, a
red bullet mark appears.
A red bullet mark may not appear for inavailable
programme to record.
7. Press BACK (
1
) to return to the TV viewing.
8. Press TIMER REC, and check whether the
schedule is registered properly or not.
