10
EXCELERATOR/LI'L
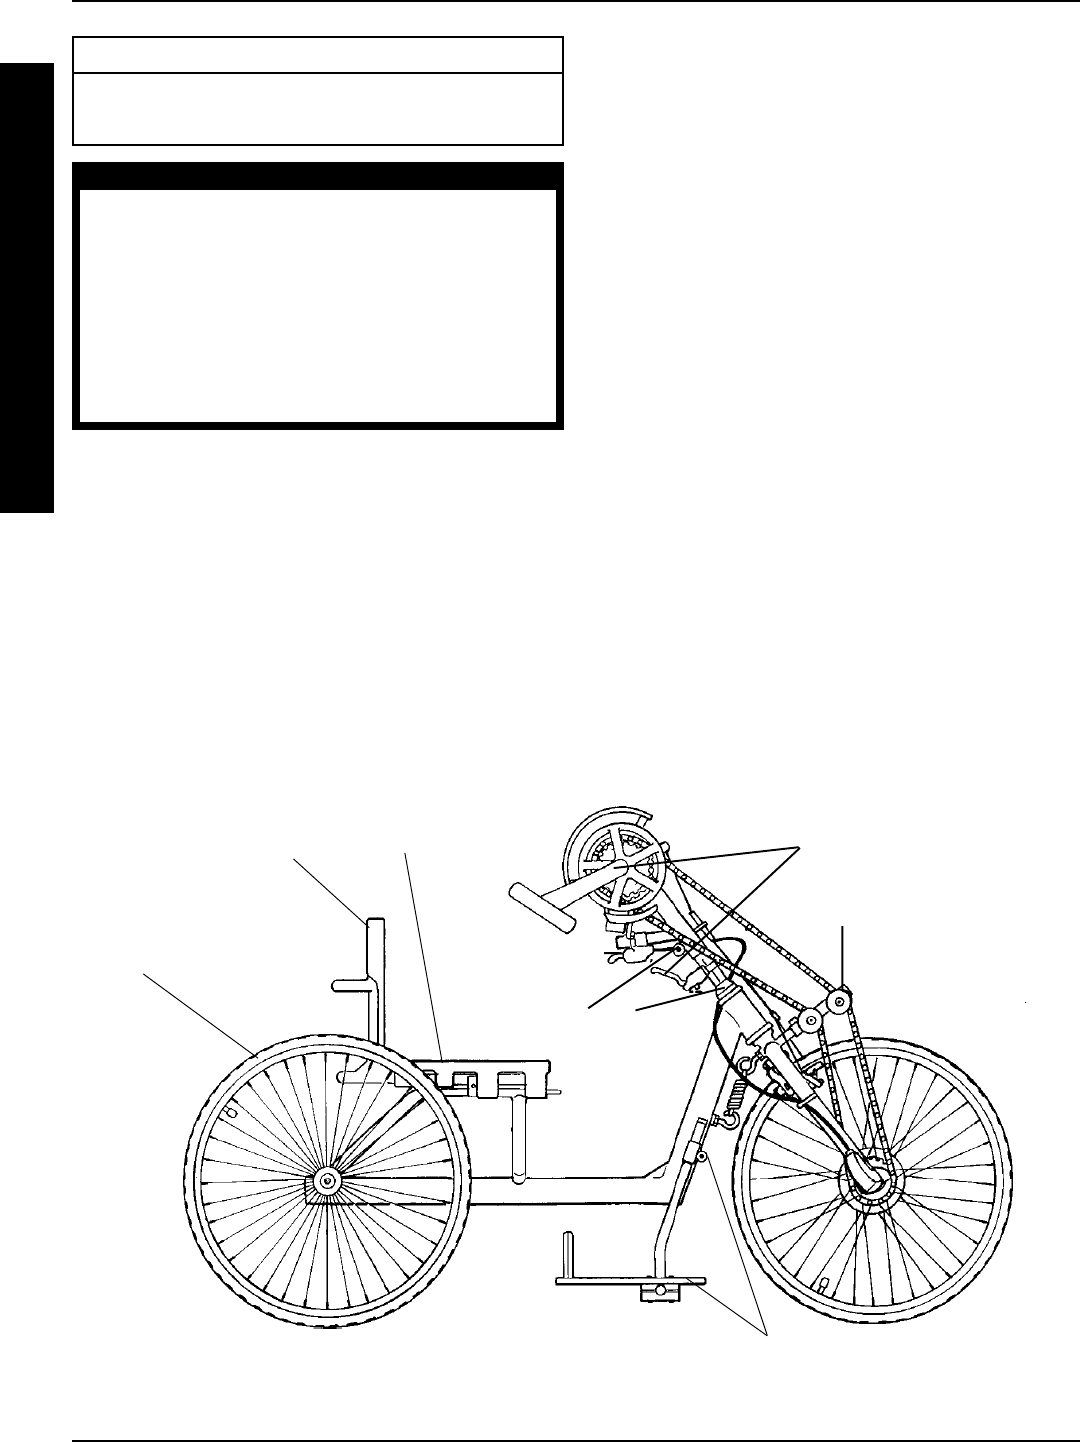
EXCELERATOR ASSEMBLY
PROCEDURES (FIGURE 1)
NOTE: Invacare recommends that the following proce-
dures be performed by a qualified technician.
Tools required:
Adjustable wrench (10-12-inches)
6, 8 and 9mm wrench
1/8-inch allen wrench
1/2-inch box wrench
Two (2) medium srewdrivers (flathead and phillips)
FIGURE 1 - EXCELERATOR/LI'L EXCELERATOR ASSEMBLY PROCEDURES
A
S
S
E
M
B
L
Y
P
R
O
C
E
D
U
R
E
S
PROCEDURE 9
PROCEDURE 6
PROCEDURE 8
PROCEDURE 6
PROCEDURE 5
PROCEDURE 4
PROCEDURE 10
PROCEDURE 11
ASSEMBLY PROCEDURES
1. Secure and adjust rear wheels (PROCEDURE 4).
2. Secure the fork assembly (PROCEDURE 5).
3. Secure and adjust tension spring (PROCEDURE 5).
4. Secure and adjust hand crank assembly (PROCE-
DURE 5).
5. Secure and adjust STANDARD three (3) speed shifter
or Seven (7) speed shifter (PROCEDURE 6).
6. Adjust chain (PROCEDURE 7).
7. Tension and adjust cantilever brake cable (Optional
[PROCEDURE 8]).
8. Fasten and adjust parking brake (PROCEDURE 8).
9. Secure and adjust back height (PROCEDURE 9).
10. Secure and adjust seat position/upholstery (PROCE-
DURE 10).
11. Secure and adjust footrest (PROCEDURE 11).
12. Check that all hardware is tight.
This Procedure Includes the Following:
Excelerator/Li'l Excelerator Assembly Procedures
Excelerator XLT/XLT 2000 Assembly Procedures
PROCEDURE 3
WARNING
After ANY adjustments, repair or service and BE-
FORE use, make sure all attaching hardware is tight-
ened securely - otherwise injury or damage may
result.
DO NOT operate the Excelerator if the hand crank
obstructs your view. If the hand crank obstructs
your view, adjust the hand crank height BEFORE
using the Excelerator - Otherwise injury or dam-
age may occur.
