7
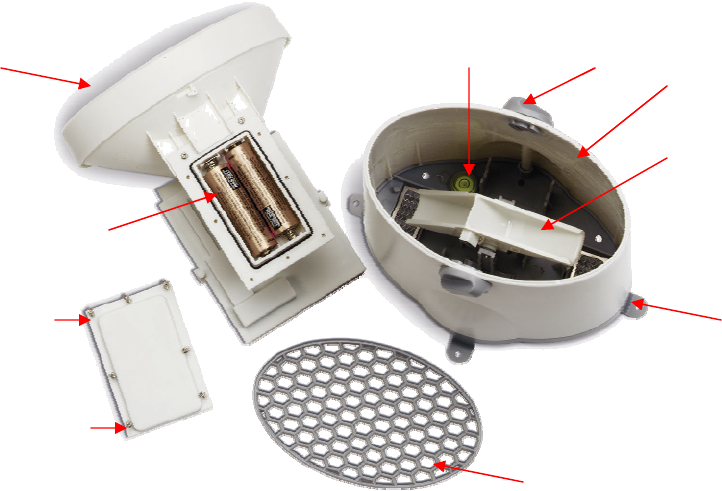
D. Funnel-shaped top with battery compartment
Contains battery compartment and rainfall counting electronics
E. Battery compartment
Holds two AA-size batteries
F. Screws
Secures battery compartment cover
G. Built-in level with bubble
Ensures level rain gauge mounting for proper operation
H. Bucket see-saw mechanism
Collects the rainfall in one of its containers and self-empties once full
I. Protective screen
Protects the rain gauge funnel from debris
Battery installation
• Unlock the funnel-shaped top on the rain gauge by turning both knobs on the sides in an anti-clockwise direction.
• Remove the funnel-shaped top lifting it off the rain gauge bucket.
• Remove 7 small screws from the battery compartment cover using a small Phillips screwdriver
• Insert 2 “AA” size alkaline batteries (not included), matching the polarities as shown in the battery compartment.
• Replace the battery compartment door and secure the screws.
• Insert the funnel-shaped top into the rain gauge bucket and secure it in place by turning the knobs clockwise.
Mounting
• Make sure that the rain gauge bucket is level – check inside built-in level for bubble center.
D
E
F
G
I
H
C
A
B


