Getting Started (Initial Setup)
29
another option, then set the time again.
To set the clock manually
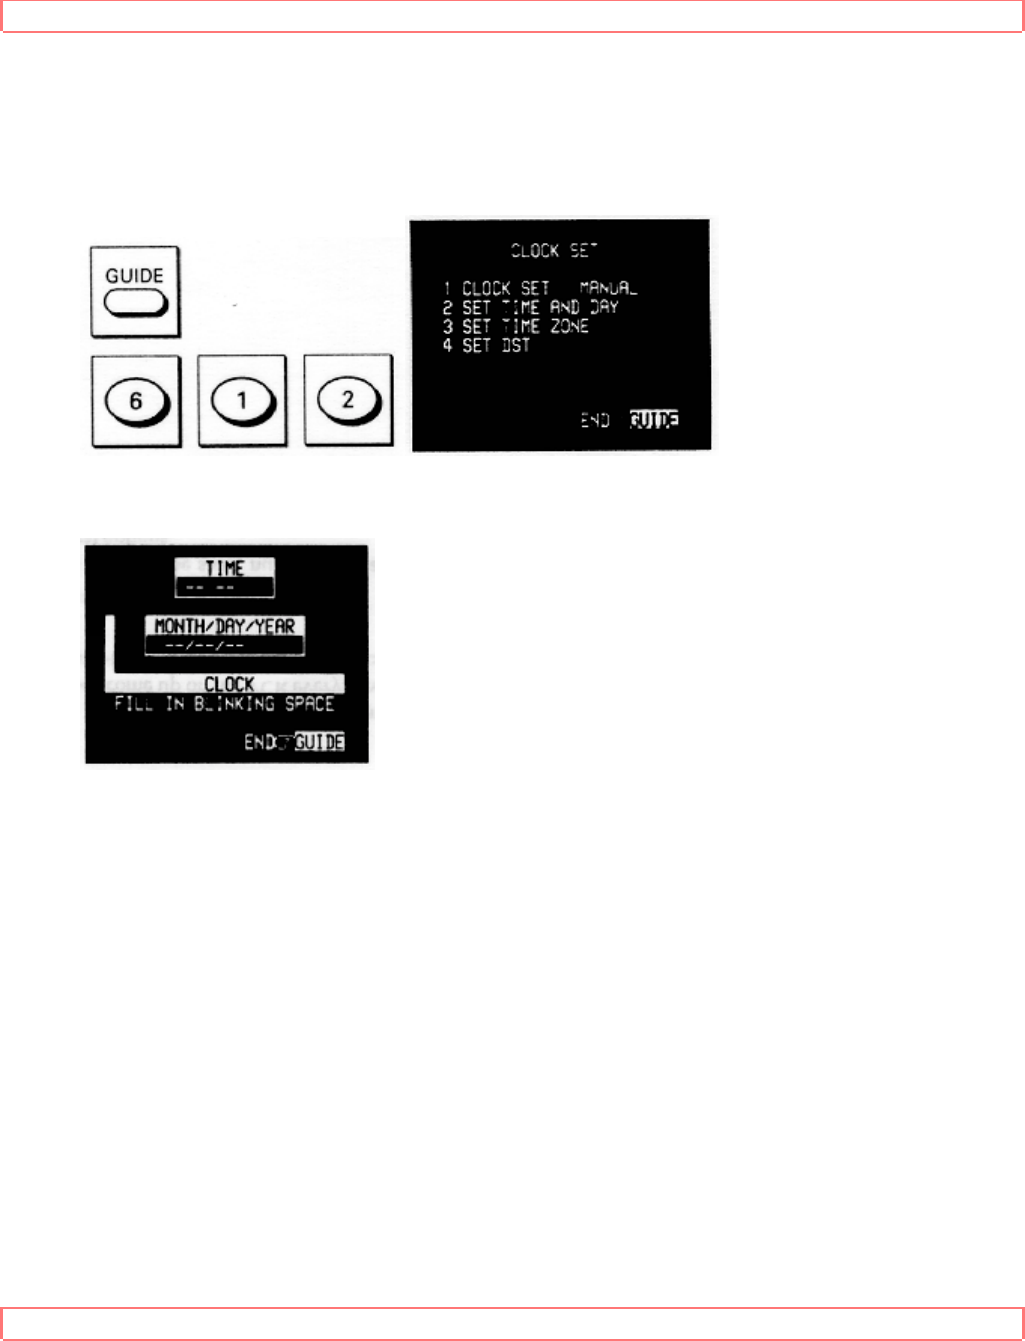
1. Press GUIDE, then press 6 to bring up the CLOCK SET screen.
Press 1 to switch "CLOCK SET: AUTO" of item 1 to "CLOCK SET: MANUAL".
If "CLOCK SET: MANUAL" is specified in item 1, "SET TIME ZONE" of item 3 or
"SET DST" of item 4 cannot be selected.
2. Press 2 to bring up the following screen.
Press the number buttons on the remote control to set the current time--two digits for
the hour and two for the minutes. Then press 1 or 2 for AM or PM, respectively.
For example, if it is now 2:15 PM, press 0, 2, 1, and 5 for hours and minutes, and press
2 for PM.
Continue pressing buttons to set the date. For example, if today is July 8, 1995, press 0,
7, 0, 8, 9, and 5 to get 07/ 08/ 95.
When you're done, press GUIDE twice to return to regular viewing.
If the SETUP VCR PLUS message continues flashing, set VCR Plus+ channels
referring to the procedure in "Matching Broadcast CH numbers to VCR Plus+ channels"
on page 46. You may set the VCR Plus+ channels after you are familiar with your VCR.
Tips:
The item to be changed will blink on the screen as you go.
The clock uses the 12-hour system. You set it for AM or PM.
An illogical time (like 13 for the hour or 20 for the month) will not be accepted. A
question mark displays instead of the illogical number.
If you press the wrong digit, exit the screen by pressing GUIDE and recall the screen
