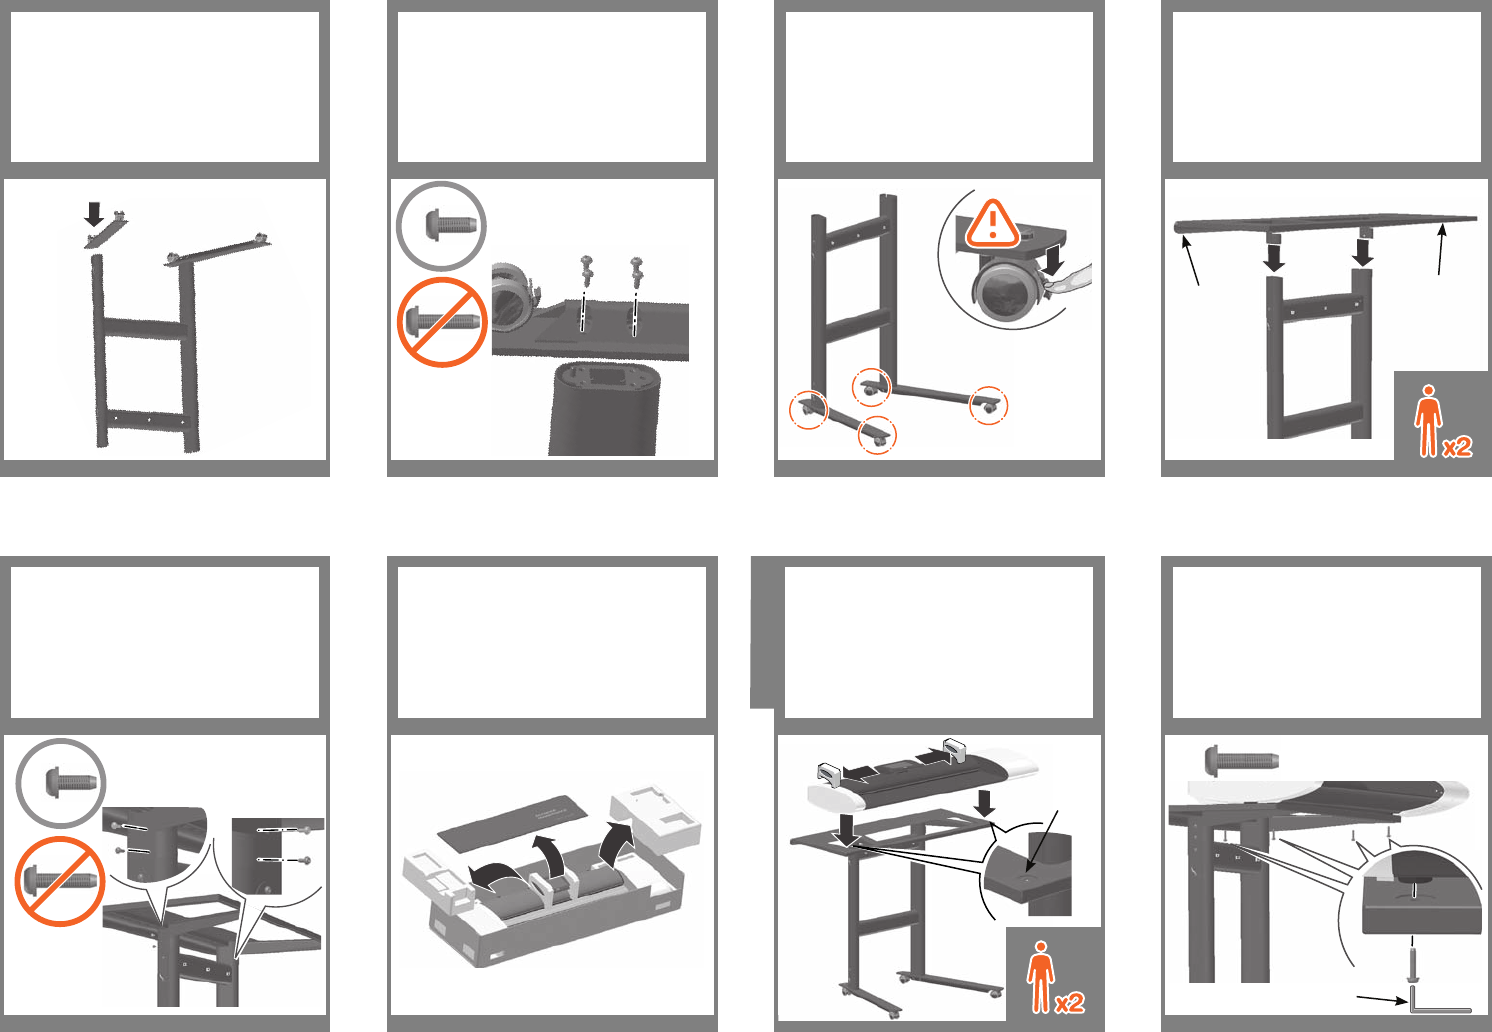
Turn the legs upside down, and attach the
two feet to the left and right legs using four
M6×30 screws (two for each foot). Tighten
the screws with the T-handle Torx driver
T30 found in the assembly kit.
9
Using 2 people; lift the scanner from the
box and place it on the Top Tray. Align
the scanner’s 4 rubber feet so they rest
in the Top Tray’s sink holes (a). Remove
the 2 protective foam pieces from the
touch-screen (b).
Make sure you have fully removed the
top of the box. Remove the Maintenance
sheet (required later), and packing
pieces.
Fix the scanner to the Top Tray with the 4
Torx M5x25 scanner xing screws. Insert
the screws through the holes in the bot-
tom of the tray and screw them into the
scanner’s rubber feet using the Allen key.
10 11 12
5
Fasten the foot using 4 M5x14 screws.
Insert all 4 screws loosely and then tighten
using the Torx screwdriver.
6 87
Fasten the Top Tray using 4 M5x14
screws: insert 2 screws loosely on each
leg, when all 4 screws are in place,
tighten with the Torx screwdriver.
Attach scanner
to stand
Place the leg structure upright. Be sure
that all four wheels are locked.
Using 2 people; take the Top Tray from
the box. Position the Top Tray on the leg
structure with the rounded edge facing
the back and its at edge facing the
front. Insert the tray’s bottom mounts into
the 2 leg tops.
X4
Rounded edge
facing the
back
Flat edge
facing the
front
Sink hole
X4
Take the other foot from the box. Align
the foot with the other leg on the leg
structure, making sure it is in its correct
position and angle. Insert the leg
structure’s guiding-peg into the middle
hole.
a
a
b
b
X4
Allen key
Learning Products Barcelona - Hewlett Packard Company


