20
USING THE FEATURES MENUS
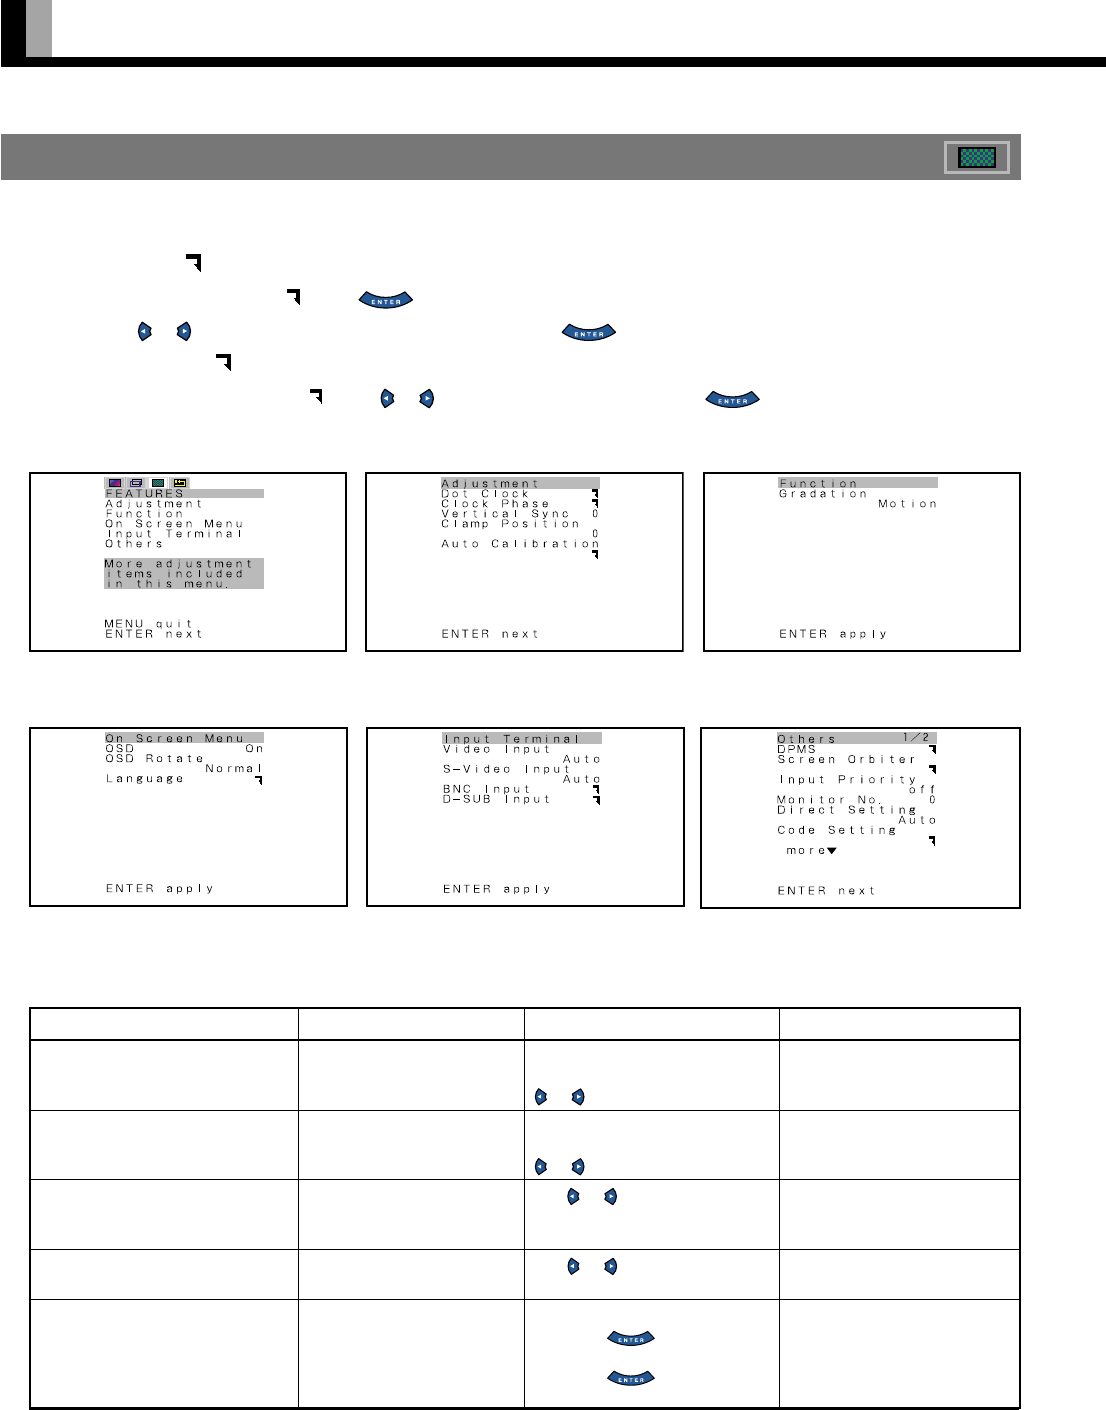
• FEATURES setup screen has 5 options of Adjustment, Function, On Screen, Input Terminal and Others.
• Options with “ ” on the right
When you select an option with “ ”, press . The adjustment/setup screen for that option appears.(See P. 28–36.)
You can use
or on this screen to make selections or changes.Press to store.
• Options with no “ ” on the right
When you select an option with no “ ”, press or to make selections or changes. Press to store. (See P. 28–36.)
FEATURES Menu
FEATURES Menu screen (RGB Input
Mode)
Adjustment Menu screen Function Menu screen
HOW TO USE MENUS (Continued)
On Screen Menu screen Input Terminal Menu screen Others(1/2) Menu screen
Adjustment Menu (See P. 29.)
Option
(1) Dot Clock
(for RGB)
(2) Clock Phase
(for RGB)
(3) Vertical Sync
(for RGB)
(4) Clamp Position
(for Comp.video, RGB)
(5)Auto Calibration
(for RGB)
Function
Adjusts the dot clock.
Adjusts clock phase.
Corrects vertical
synchronization signal.
Adjusts clamp pulse phase.
Selects the optimum
dynamic range of images.
Operation
Eliminates blur when the
optimum value is selected with
or .
Eliminates blur when the
optimum value is selected with
or .
Use
or to select the
optimum value for eliminating
flicker.
Use
or for switching.
Display Auto Calibration screen
and press
to execute.
Select Execute, and select Yes
and press
to execute
Auto Calibration.
Range
-60 to +60
Auto/Manual
(Can adjust 1 to 32 for
Manual)
-1 to +1
-8 to 8
Execute
Yes/No


