2
Removing and Installing Components
This section provides detailed information on how to remove or install the components from your
computer.
Removing the Battery
WARNING: Using an incompatible battery may increase the risk of fire or explosion. Replace the
battery only with a compatible battery purchased from Dell. The battery is designed to work with
your Dell computer. Do not use a battery from any other computer with your computer.
WARNING: Before removing or replacing the battery, turn off the computer, disconnect the AC
adapter from the electrical outlet and the computer, disconnect the modem from the wall
connector and computer, and remove any other external cables from the computer.
WARNING: Not for use in hazardous locations. See installation instructions.
1. Follow the procedures in Before Working Inside Your Computer
2. Push and hold the battery release button to the right while pulling on the plastic battery tab
Installing the Battery
1. Slide the battery into its slot until it clicks into place.
2. Press firmly on the door until a click is heard and the latch is engaged.
3. Follow the procedures in After Working Inside Your computer
Removing the Hard Drive
1. Follow the procedures in Before Working Inside Your Computer
2. Remove:
a. Battery
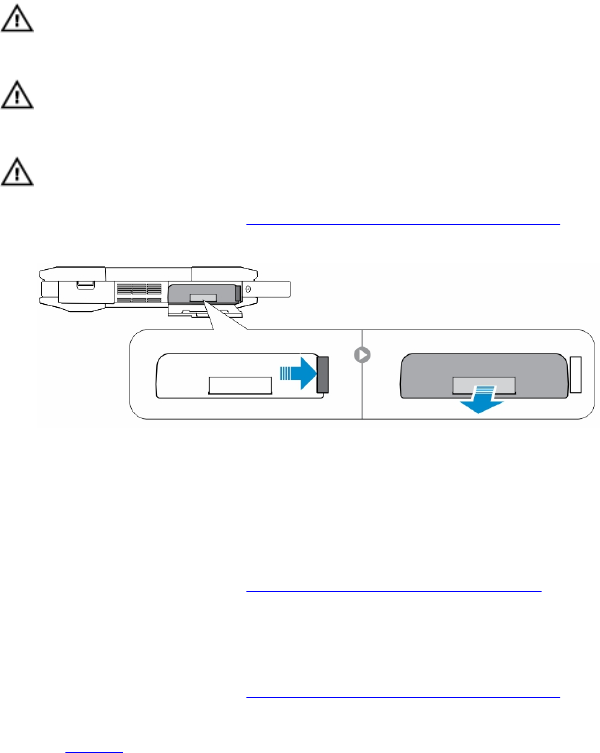
3. Perform the following steps as shown in the illustration:
a. Unlock the hard-drive press latch door [1].
b. Push it downwards to open it [2].
c. Push and hold the hard drive release button to the left while pulling on the plastic hard-drive tab
[3].
8


