6
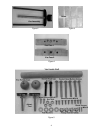
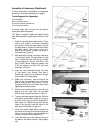
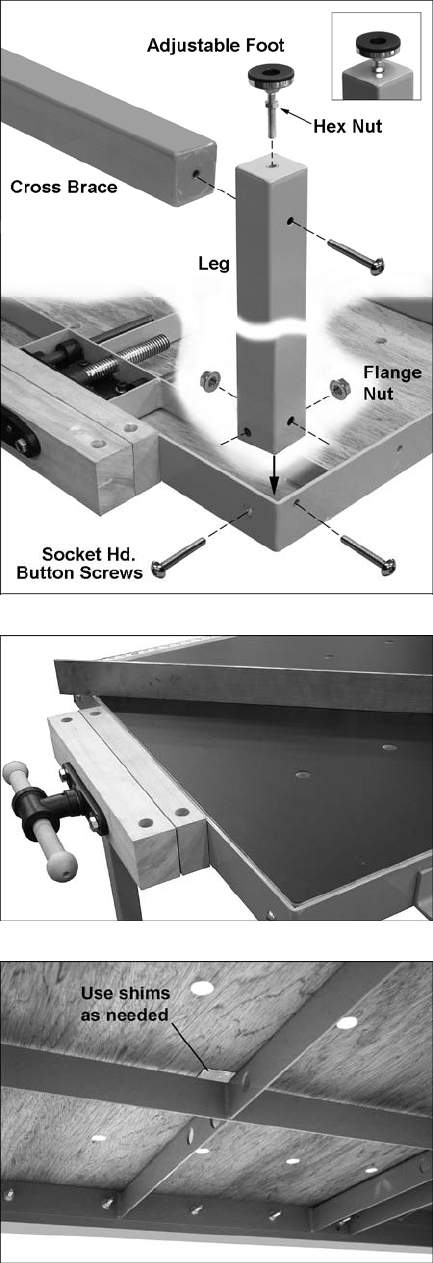
9. Position the cross brace between the legs,
aligning the holes at the ends of the cross
brace with the holes in the legs, as shown in
Figure 10.
10. Insert a socket head button screw through
each leg and into the threaded holes at the
ends of the cross brace. Tighten the screws.
11. Fully tighten the four flange nuts already
installed on the legs.
12. Install an adjustable foot into the threaded
hole at the end of each leg, as shown in
Figure 10.
NOTE: The adjustable foot will be used to
level the workbench after it has been
installed on the saw. The adjustable foot is
rotated in or out to the correct height, and
the accompanying hex nut is then tightened
against the end of the leg to maintain the
setting (see inset photo, Figure 10).
13. Turn the workbench right side up, and
position it between the rails of the tablesaw.
The workbench should be flush to, and level
with, the cast iron table of the saw. (Raise or
lower the adjustable feet as needed to
assist in this.)
14. Using the fasteners that came with the rails,
secure the workbench to the rails. (Refer to
the Accu-Fence Manual M-2195079Z for
more detailed information on this.)
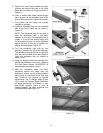
15. After the workbench table has been
positioned against the table saw, the
workbench surface can be raised at certain
points using the provided shims. This may
help “fine-tune” any leveling or flatness
adjustments. Use a straight edge (Figure
10) to check for flatness. (More information
on these procedures is available in your
Accu-Fence manual.) Place a shim as
needed between the table underside and
the metal braces (see Figure 12).
Figure 10
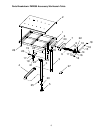
Figure 11
Figure 12


