HELPFUL TIP!
The light on top of the Twin Electronic Breast Pump Motor indicates the pump mode:
Flashing ORANGE Light: Pump is in warm-up mode. Wait for the continuous GREEN light.
Continuous GREEN Light: Manual pumping mode. You control the speed and pressure
of the pump.
Flashing GREEN Light: Automatic pumping mode. Your breast pump will mimic your last
established pumping rhythm and level of suction.
Flashing RED Light: Consult the ‘Troubleshooting Guide’ on page 18.
14
Need Help? Call us at 1.800.54.AVENT or visit www.philips.com/AVENT
7
8
6
5
Your Electronic Breast Pump Mimics Your Pumping: To create a natural
breastfeeding rhythm, we suggest you hold down on the handle for
3 seconds, then release and repeat the pattern for the next compression.
Next, press the blue One-Touch Memory Control on the
handle. The mode light on the pump motor will change from solid
GREEN to flashing GREEN and your breast pump will mimic the
rhythm of the last two compressions.
Note: You do not need to compress the handle fully, only until it feels comfortable. The
further you compress the handle, the more suction the pump will provide. If the pressure
is uncomfortable, stop the automated pumping by pressing the One-Touch Memory
Control and breaking the seal between your breast and pump funnel with your finger.
Changing the Speed and Level of Suction: Press the blue
One-Touch Memory Control on the handle again, and the pump
will revert to manual control. The light will turn from flashing
GREEN to solid GREEN. Establish a comfortable speed and level
of suction. Press the blue One-Touch Memory Control again, and
your Electronic Breast Pump will continue the same pumping rhythm.
Ending Pumping Session: Press the blue One-Touch Memory Control,
break the seal between your breast and pump funnel with your finger
and remove the pump from your breast. Turn the pump off and
unplug at the power source. Your Electronic Breast Pump will
remember and save the speed and suction level of your last two
compressions. Unscrew the base after milk is collected. If any milk
remains in the pump body, pour it into the base. Do not overfill the
base. Wash and re-sanitize all necessary parts before the next use.
Next time you turn your pump on: Resuming Saved Session? Turn on the pump as in
Step 1. Complete Step 2. Press the blue One-Touch Memory Control.This engages the
automatic pumping mode. The pump will continue with the rhythm of the last two saved
compressions of the milk expression phase. Continue pumping as described in Step 4.
Need to re-establish let-down? If you need to establish let-down, turn on the pump as in
Step 1. Complete Step 2. Squeeze the handle with shallow quick strokes and proceed as
described in Step 3.
CONSULT THE GUIDELINES FOR STORING EXPRESSED BREAST MILK ON PAGE 16 & 17.
13
Before you begin pumping, make sure that you have correctly washed, sanitized and
assembled the pump. Consult the ‘Preparing to Pump’ Section on page 7 for tips on
stimulating let-down and milk flow.
4
3
1
2
Wash your hands thoroughly and make sure your breasts
are clean.
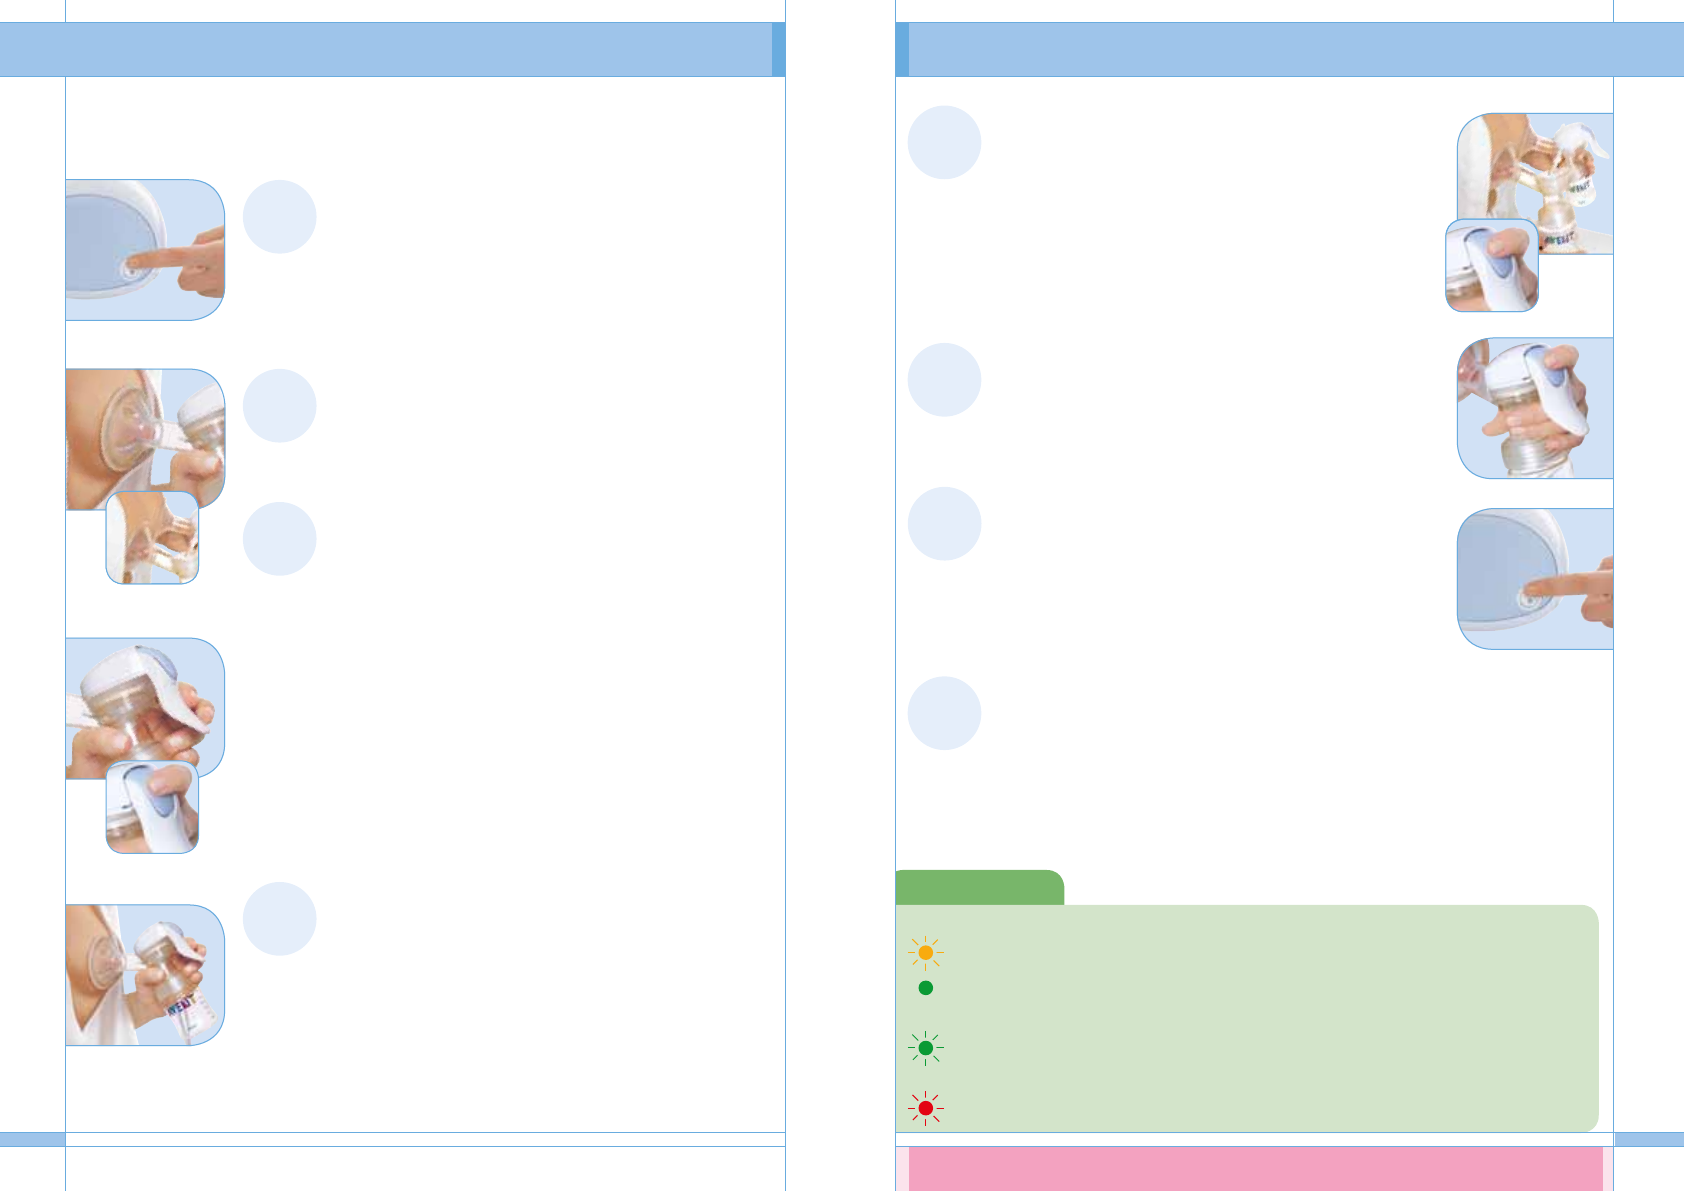
Turn on Pump: When the flashing ORANGE light changes
to a continuous GREEN light, the pump is ready to use.
If the light is flashing RED, refer to the ‘Troubleshooting Guide’
on page 18.
Form a Seal: Press the pump against your breast, so that
your nipple fits into the funnel. A seal should form between
the pump and your breast. (If double pumping, press a pump
to each breast.)
Let-down: Let-down is your body’s physiological response to
the suckling action of your baby on the breast. This stimulates
the breast to produce milk and send it towards the nipple
where it is available for baby.
To initiate let-down, begin by squeezing the handle with shallow
quick strokes. This is intended to imitate your baby’s natural
suckling pattern. At the same time you are doing this, you are
enabling the petals on the Let-down Massage Cushion to flex in
and out around the areola, creating a massaging effect. This is
intended to help stimulate the natural let-down reflex. Let-down
can occur immediately after a few strokes and should not take
longer than 5 minutes (refer to page 7 on ‘Preparing to Pump’).
You can choose to automate this let-down phase by pressing
the blue One-Touch Memory Control or you can continue
to pump manually.
Milk Expression: Milk Expression occurs after let-down
is achieved and milk begins to flow. It is the phase that
is induced by the baby’s deeper more comfortable
suckling rhythm.
If you did not automate the let-down rhythm, please skip to
Step 5. If you have automated the let-down phase in Step 3,
press the blue One-Touch Memory Control to end the let-down
rhythm. You can now begin to establish a comfortable pumping
rhythm and level of suction that can be maintained throughout
your pumping session.
Pumping with Your Electronic Breast Pump Pumping with Your Electronic Breast Pump


