3
E1
E2 F1
F2 F3
F4
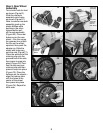
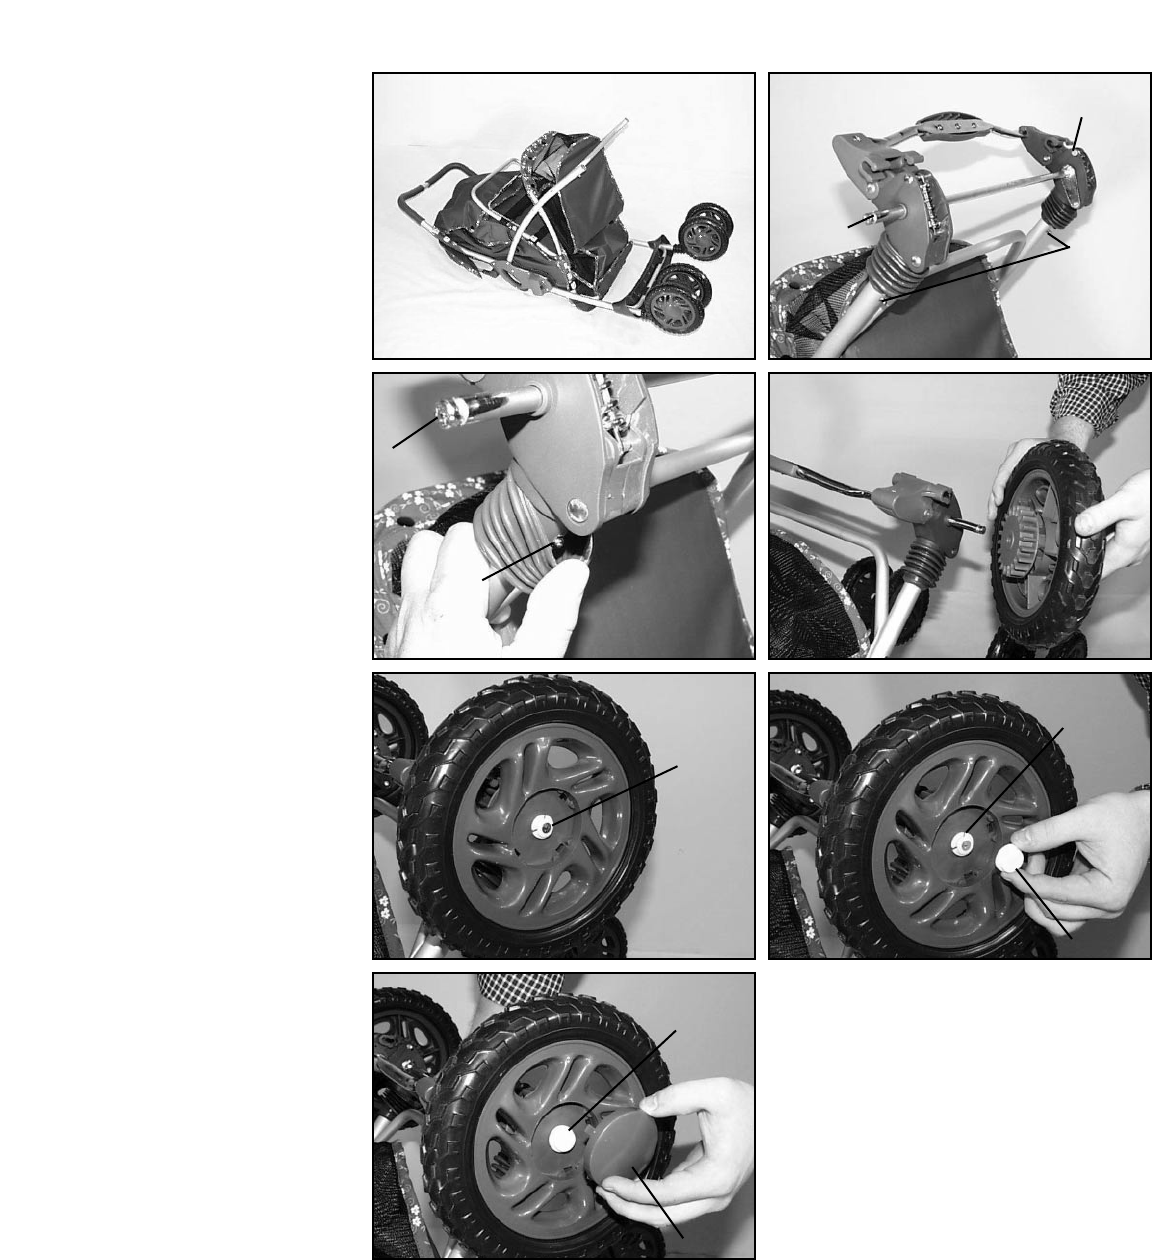
Step 3. Rear Wheel
Assembly
Turn stroller onto its front
as shown (Figure D).
Slide the rear axle
assembly onto frame
as shown (Figure E1).
Note: to remove rear axle
assembly push up the
plastic baffles while
pushing in the silver
release button pull
off the axle assembly
(Figure E2). Place rear
brake cog on the rear
wheel – turn the cog so
the grooves line up with
the ribs on the wheel
sprocket, then push the
adapter on. Slide the
wheel with brake cog
onto the axle (Figure F1).
Place the wide end of the
retaining clip onto the
grooved end of the axle,
then press to snap into
place (Figure F2). Posi-
tion the axle cap over
retaining clip and then
press to snap into place
(Figure F3). Place the
hubcaps on the wheels –
align the hubcap tabs
with the holes in the
center of the wheel,
then press into place
(Figure F4). Repeat for
other side.
D
Rear Axle
Rear Axle
Assembly
Rear Axle
Assembly
Release
Buttons
Both Sides
Rear Axle
Rear Axle
Assembly
Release
Button
Retainer
Clip
Retainer
Clip
Axle Cap
Axle Cap
Hub Cap


