


7
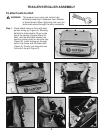
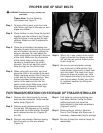
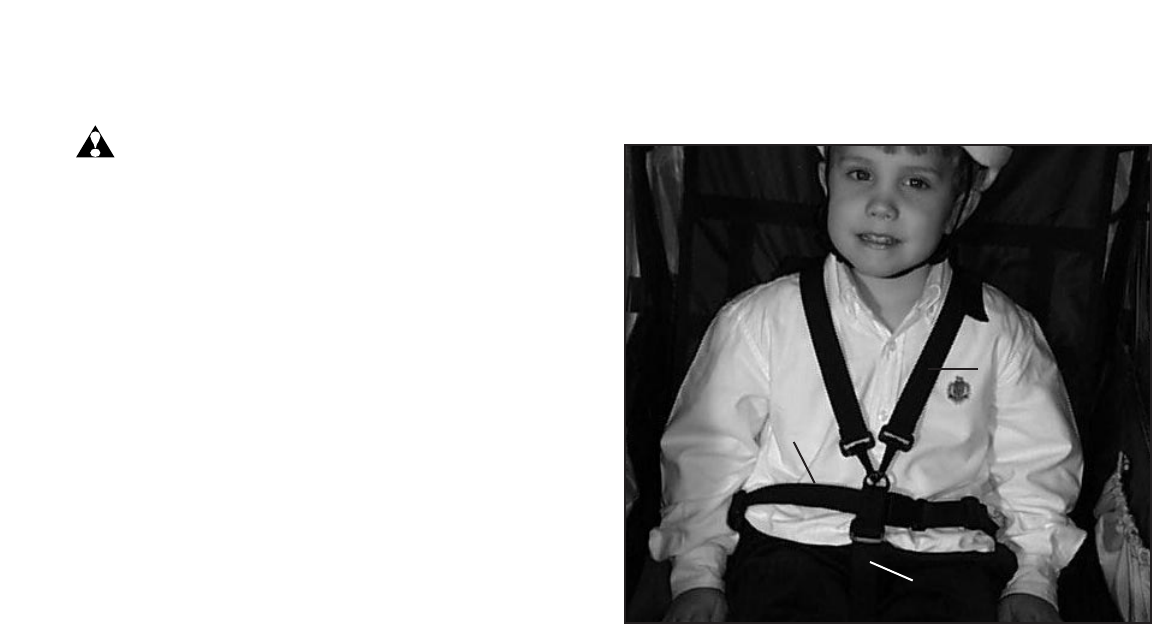
PROPER USE OF SEAT BELTS
FOR TRANSPORTATION OR STORAGE OF TRAILER/STROLLER
WARNING: Avoid serious injury, always use
seat belts.
Please Note: For the following
instructions see Figure Y.
Step 1. To place child in seat, undo front and
side Velcro, pull flap all the way up, and
drape over rollbar.
Step 2. Place children in seat. Snap the lap belt
together over the children’s lap. Please
note that there is one lap belt for both
children. Make sure belt is adjusted to
fit snugly.
Step 3. Place set of shoulder harnesses over
shoulder of each child and clip the hook
end of shoulder harness by pulling the
strap on harness. You can adjust the
crotch strap length according to the size
of the child. Make sure the connection
of the crotch strap to the shoulder
harness is located near the child’s
stomach. You do not want the crotch
strap too high on the child’s chest.
Step 4. When using with one child, you must
place the child in the center of the seat.
Attach lap strap across child. There is a
crotch belt for the center position. Take
the two shoulder harnesses in the
center of the seat and clip into the
center crotch strap. Make sure crotch
strap comes up between child’s legs.
Adjust belts for a snug fit.
Y
Step 5. When not in use, always hook crotch
strap to shoulder harnesses so belts
will not drag on ground. Adjust center
crotch strap too.
Step 6. Be sure to securely fasten canopy
over front end of trailer/stroller. Your
trailer/stroller comes with a mesh front
and rain shield. The mesh front must
always be down to protect your child
from objects that may fly up from your
rear bicycle wheel. Protect your child
in inclement weather by rolling rain
shield down.
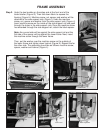
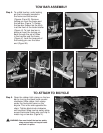
Step 1. Remove hitch from bicycle by turning
knob counter clockwise. Unclip tow bar
safety strap (Figure X).
Step 2. Remove quick release tow bar pin. Flip
the tow bar 180 degrees so it is resting
underneath the trailer/stroller. Reattach
quick release tow bar pin (Figures R
thru W).
Step 3. Remove rear wheels. Remove locking
pins from axle on the rear wheels
(Figure O).
Step 4. Fold trailer by removing locking pins
from black latches. Unclip the black
latches and push the top of the
trailer/stroller to fold down completely
(Figures E and F).
Step 5. Remove flag by sliding it from the
Two-in-One Canopy and Raincover. If
necessary, disassemble flag for storage.
Step 6. Be sure to keep this manual handy for
reassembly.
Lap Belt
Shoulder
Harness
Crotch
Strap