


3
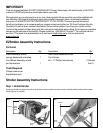
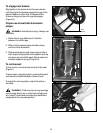
Step 2. Rear Wheel Assembly
Remove the rear wheel lock nut from the rear wheel axle.
Mount rear wheel to the rear wheel bracket by inserting the
axle through the hole in the bracket. Attach the lock nut and
tighten completely using an adjustable wrench. Repeat for
other side (Figure B).WARNING:The interior jam nuts are
factory installed and do not need adjustment.
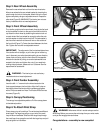
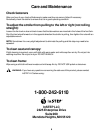
Step 3. Front Wheel Assembly
Turn stroller upright onto its rear wheels, then tip stroller back
so the handlebar is down on the ground and the front fork is
up. Attach the front wheel by loosening the exterior lock nut
on each side of the front wheel far enough to allow the axle
and tab washer to slide into the front fork.The tab washer’s
tab should be inserted into the small hole on the outside of
the front fork (Figure C). Center the wheel between the front
fork.Tighten the nuts with an adjustable wrench.
IMPORTANT: The alignment of the front wheel determines
if the stroller will roll straight, or pull to the right or left during
use. In the event you notice the stroller pulling to one direction,
loosen front axle nuts, point the front wheel in the opposite
direction the stroller is pulling, ensure the tab washers are
seated in the holes and tighten the nuts. If you need help
making this adjustment, please call our Customer Service
department for assistance.
WARNING: The interior jam nuts are factory
installed and do not need adjustment.
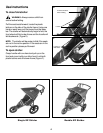
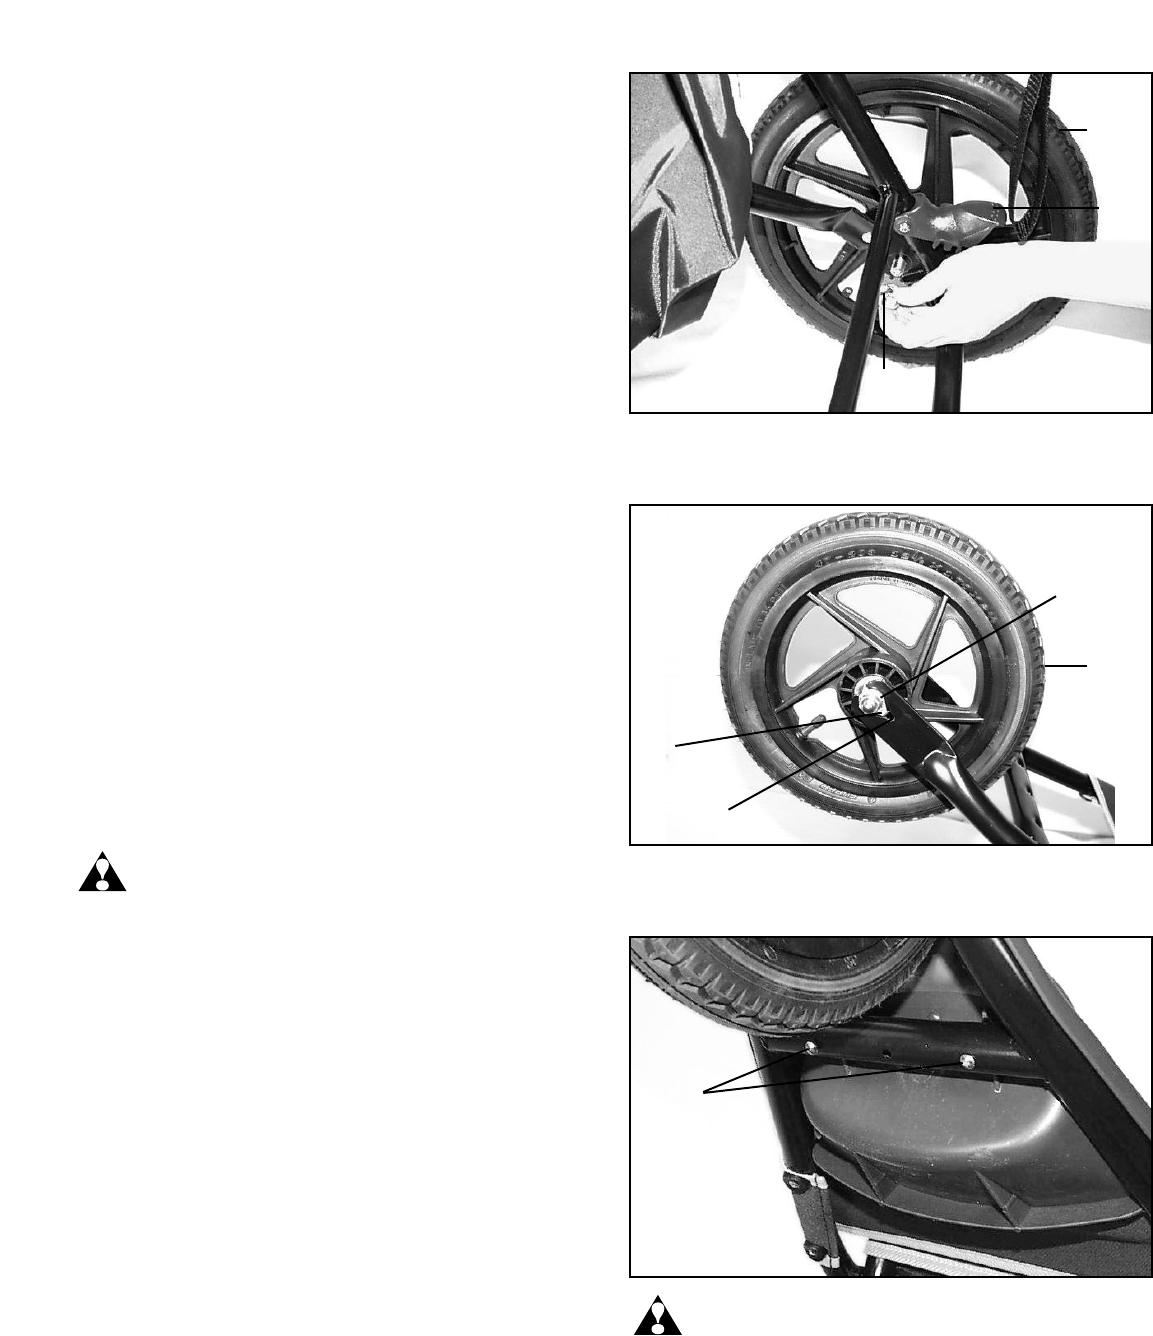
Step 4. Front Fender Assembly
Insert the #8 – 1
1
⁄2" screws into the holes located on the
front support between the front forks. Align the 2 holes on
the bottom side of the fender with the screws and tighten
with a Phillips screwdriver. Note:The Double EZStrider has
4 screws (Figure D).
Step 5. Canopy Positioning
The canopy has adjustable positions.Pull the canopy down
to the desired position.
Step 6.To Attach Wrist Strap
Place strap on top of handle bar.The wrist strap has different
sized loops.The large loop will go on your wrist, the small
loop will be on handlebar. Slide end with large loop through
the small loop, then grasp the end with the large loop and pull
strap to tighten on handlebar.
B
Rear
Wheel
Rear
Brake
Lock
Nut
D
C
Tab
Washer
Adjustment
Hole for Tab Washer
Locknut
Front
Wheel
#8 – 1
1
⁄2"
Screws
Double has
4 Holes/Screws
WARNING: Whenever child is in stroller always use the
wrist strap. Before you remove the wrist strap from your wrist make
sure you first engage the rear brakes.
Congratulations – assembly is now complete!