


FRONT SUPPORT ASSEMBLY
1. Attach the steering bracket to the front axle
assembly with the special bolt, 10mm flat
washer, and hex nut. Insert the cotter pin
through the hole of the special bolt, and
spread. Do not overtighten.
2. With the bed upside down, mount the steer-
ing bracket to the bed with four M6-1.0 flat
head screws, flat washers, lock washers,
and hex nuts.
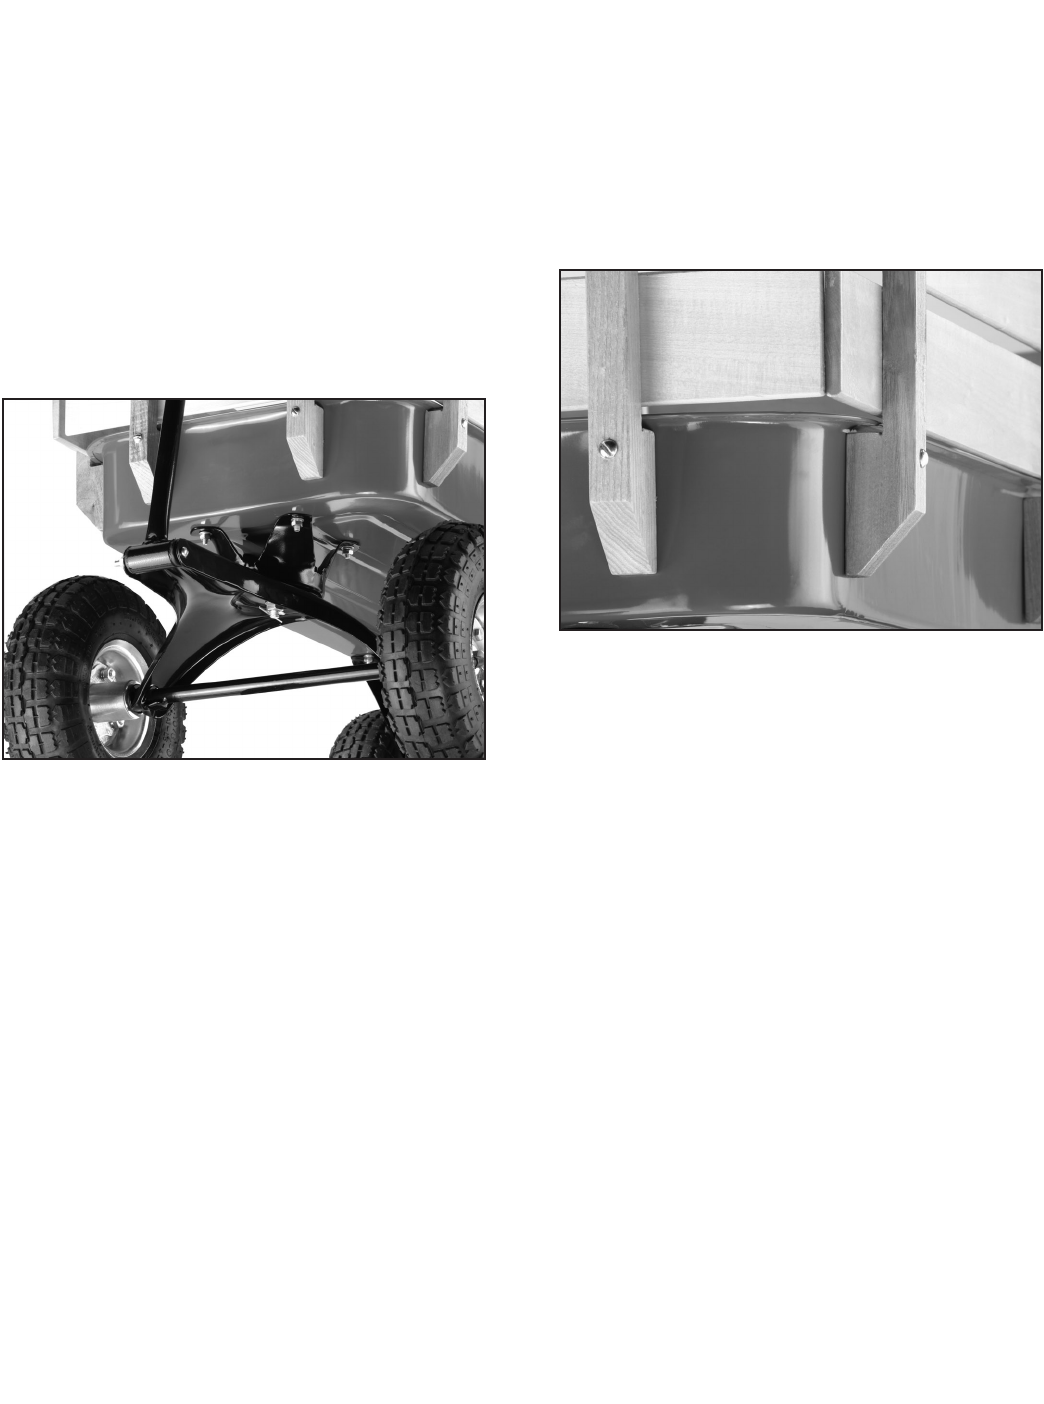
Figure 2 shows the steering
bracket preperly mounted to the bed.
REAR AXLE ASSEMBLY & WHEELS
1. Loosely mount the rear axle support to the
bed using two M6-1.0 x 16 flat head screws,
flat washers, lock washers, and hex nuts.
2. Slide the rear axle braces onto the rear axles
and bolt the opposite ends of the braces to
the bed using the remaining M6-1.0 x 16 flat
head screws, flat washers, lock washers, and
hex nuts.
3. Tighten the rear axle support.
4. Slide a wheel onto each axle with the valve
stems to the outside.
5. Insert and spread a cotter pin into each
axle, and place the plastic axle caps into the
axles.
ASSEMBLY INSTRUCTIONS
WOOD STAKE SIDES & PULL HANDLE
1. Turn the wagon right side up.
2. Mount the left and right rear wood stake sides
to the outside of the bed with M6-1.0 x 45 slot
head screws, flat washers, and acorn nuts,
as shown in Figure 3.
Figure 2. Steering bracket and front axle assem-
bly mounted to the bed.
Figure 3. Wood stake side mounted to the out-
side of the bed.
3. Mount the front wood stake side to the out-
side of the bed with M6-1.0 x 45 slot head
screws, flat washers, and acorn nuts.
4. Mount the rear wood stake side to the outside
of the bed with M6-1.0 x 45 slot head screws,
flat washers, and acorn nuts.
5. Using the M6-1.0 x 75 slot head screw, M6-
1.0 hex nut, flat washer, and lock washer,
attach the pull handle with the to the opening
in the front axle support.
If you need additional help with this procedure,
call our service department at: (570) 546-9663.