


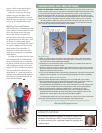
3
5
4
7
6
8
before you apply your final finish.
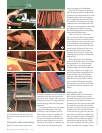
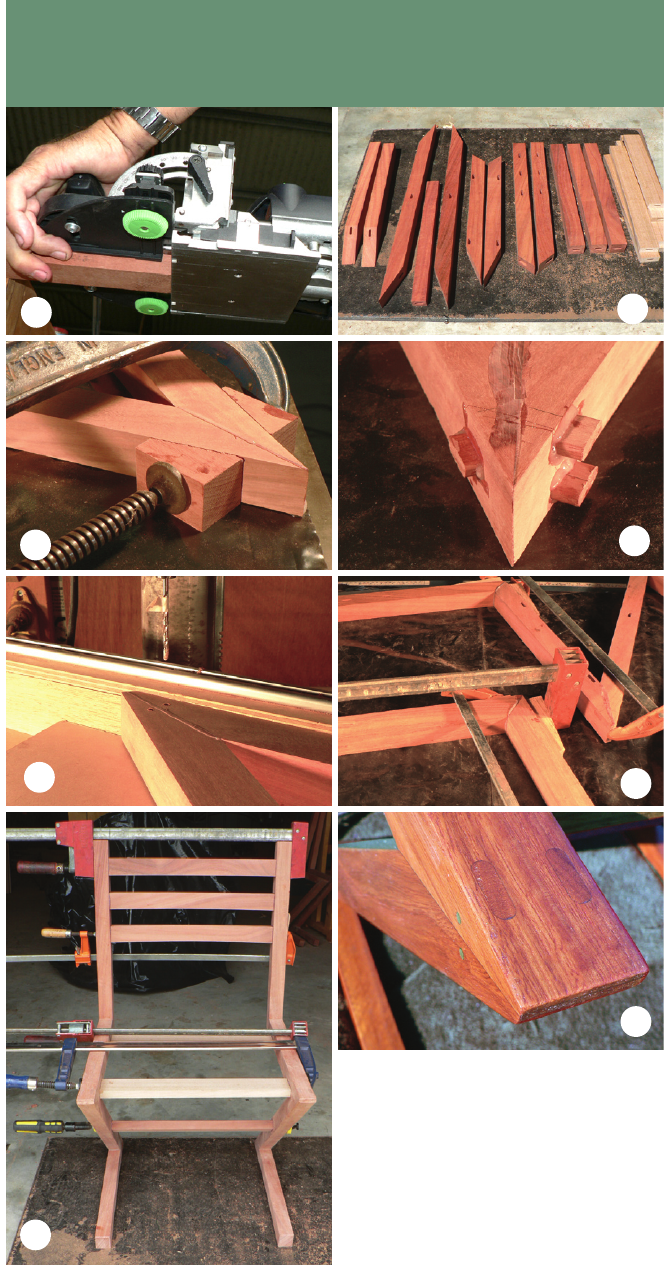
First, the 22.5° miters are glued up
(Fig. 5) using a Domino in mortise B
to ensure precise alignment of the joint.
When the epoxy has set, the squeeze-
out is cleaned up, and mortises J and
K are milled; the locking tenons, shop-
made from the same hardwood as the
chair parts, are then glued in place (Fig.
6). When the glue has set, cut away
the projecting portions of the locking
tenons and sand them level.
Drill 1¼"-deep
7
/64" pilot holes
(Fig. 7) for the #8 brass screws; smear
the screws with epoxy and drive them
home, taking care not to split the wood
by driving them too hard against the
bottoms of their pilot holes. When the
epoxy has set, the heads of the screws
are sawn off and the screw shanks
are filed (wrap the tip of the file with
masking tape to prevent marring) and
sanded level.
Before gluing the 49° miters (Fig.
8), cut away the tips of the 22.5° miters,
removing about
3
/8". After the sides
are glued up you can gently round
this front edge with a smooth file and
sandpaper. Make four 8° wedges out
of scrap to facilitate clamping the 49°
miters. Finally, when the 49° miter
joints have been glued up, drill pilot
holes for screws to pin their reinforc-
ing 20 x 50mm Dominoes, and glue
them in place. Cut off the screw heads
and file and sand their shanks level as
before.
Gluing the rails
After sanding each of the side assem-
blies, lay one assembly on its outer
face and insert epoxy into the mortises
for the cross rails. Push 6 x 40mm
Dominoes into the mortises and stand
the back rails, seat rails, and stretcher
vertically in position. Insert epoxy and
Dominoes into the top end mortises
of the rails; insert epoxy into the mor-
tises in the second side assembly, and
then get a helper to assist in fitting the
assembly onto the Dominoes project-
ing from the ends of the rails. When
the second assembly has been pushed
home, stand the chair upright with its
project photos: david dundas
grain of the back rails, seat rails, and
stretcher are all centered in their end
faces.
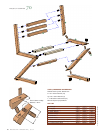
Gluing the side assemblies
Before you start to glue up the side
assemblies, bandsaw the waste from the
underside of the feet and sand all the
parts (Fig. 4) to 150-grit. Glue 100-grit
sandpaper to the 22.5° wedge offcuts to
prevent slippage when the clamps are
tightened.
The glueup is done in several stages,
using a gap-filling epoxy with a gel
consistency and a hardener that will
allow plenty of time for assembly. It’s
easy to clean up after using epoxy if
you spread carnauba wax in the areas
that you expect squeeze-out to occur.
The epoxy won’t stick to it and the wax
can be removed with mineral spirits
42 w oo d c ra f t m a ga z i ne | 05 . 07
10
9
70
proect numer