


Replacing Fuses
If the unit does not function at all when connected to the main power supply i.e. does not illuminate, then it
is highly likely that the fuse has blown.
Disconnect from main power supply before attempting to replace either lamps or fuse.
In order to replace the fuse, disconnect from the main power supply and then unscrew the fuseholder cover
to reveal the fuse. The unit has a label attached which indicates the correct fuse rating or you may refer to
the portion of this guide labeled Technical Specifications. It is most important that replacement fuses are of
the correct rating. Failure to use the correct fuse could damage the unit beyond economic repair.
The fuse should simply be placed inside the holder and the screw cap replaced. Reconnect to main power.
Maintenance & Servicing
Work on internal parts should be carried out by a qualified technician. Removal of any covers other than
the lamp replacement cover and screw cap fuseholder is considered a breach of warranty and will not be
covered under any such agreement unless authorized first by the company.
Introduction
Congratulations on the purchase of your new CHAUVET controllert. We are confident you will enjoy many
trouble free hours with this unit. To assist with the care and use of the product we have prepared this short
guide.
Operation
This strobe controller has been designed to function on a mains power supply of either 120V~60Hz or
230V~50Hz and has been fitted with a suitable power plug for use with your local voltage. Check the label
and voltage selector switch (if fitted) on the unit and the power plug for the correct voltage.
The CH-751 connects to the strobe light (such as Chauvet’s CH2000 or CH750) via mono cable.
The three position switch allows the CH-751 to be used in the following ways:
1. Standby - The user can manually flash the strobes by pressing the flash button. The flash rate is set by
using the speed control.
2. Audio - The strobe light will flash to the beat of the music. The flash rate is set by using the speed
control. The audio control adjusts the sound sensitivity.
3. Flash - The strobe light will continuously flash at the rate set via the speed control.
When connected to the mains power supply with the selector switch set to flash, the red LED on the front
ofunit should begin to flash.
Cleaning
This unit may be wiped with a soft damp cloth. We recommend that internal cleaning only be carried out by
a qualified technician.
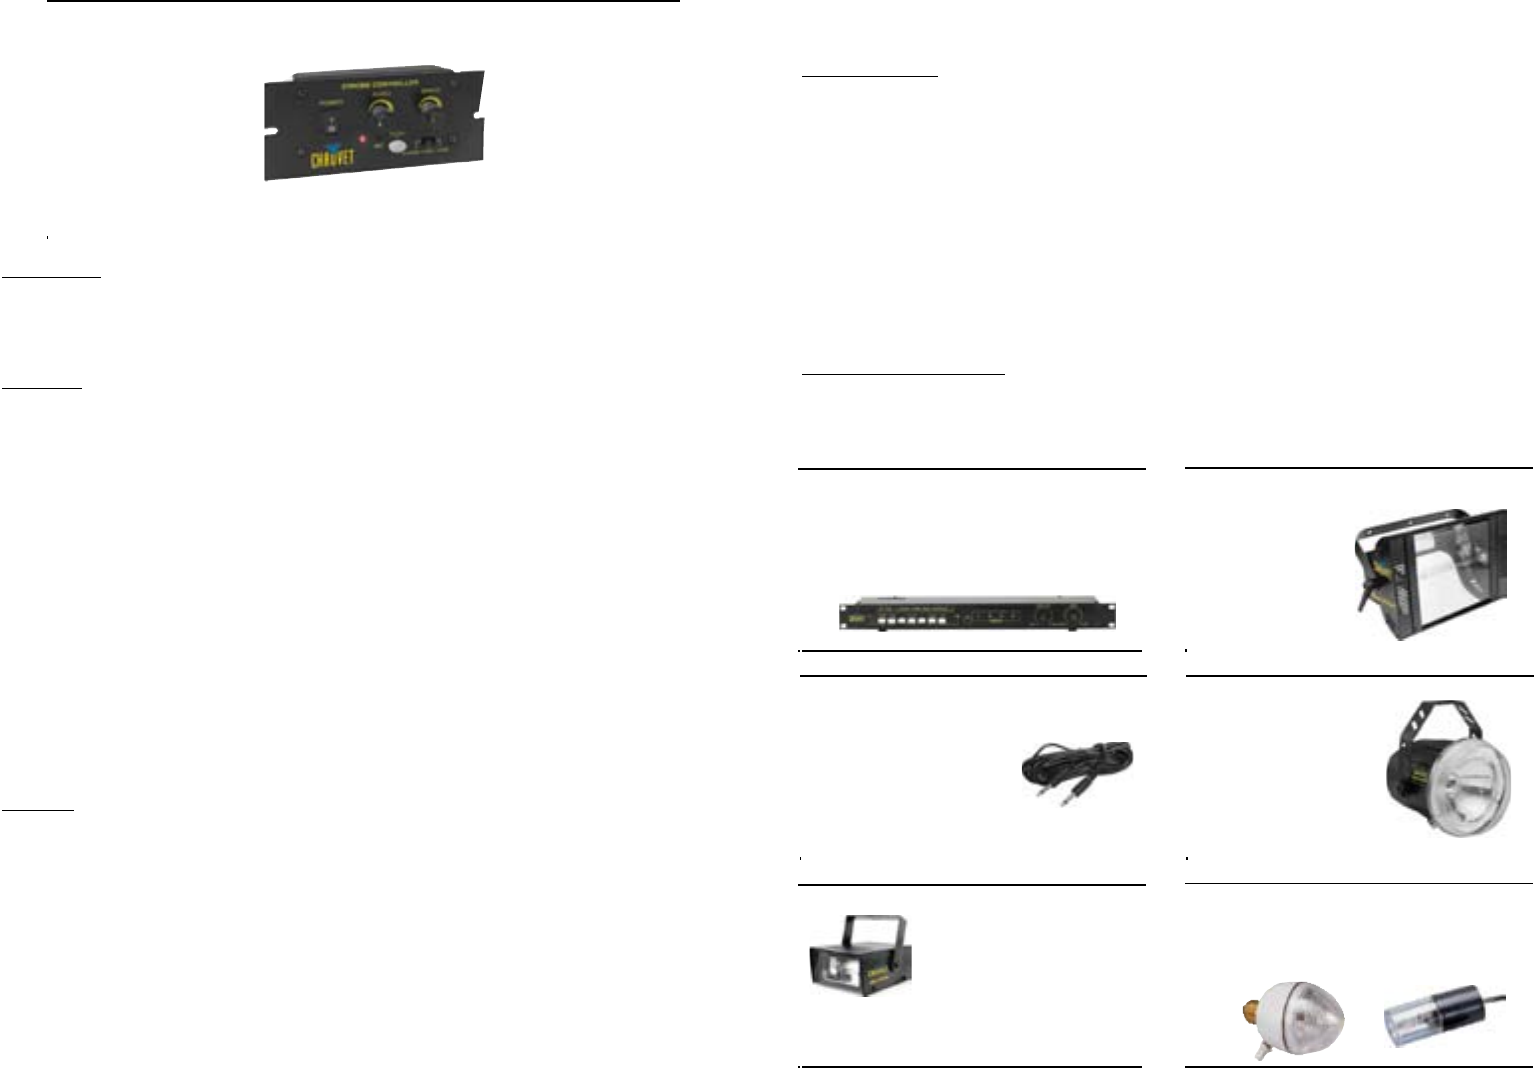
• Power Switch
• Sound Sensitivity
• Strobe Speed Control
• Microphone
• Flash Button
• Function Selector
At the Rear:
• Mono or Stereo Contol
Cable Jac
• Power Cable
• Screw Cap Fuseholder
Fig. 1
4 CHANNEL STROBE CONTROLLER
SC-1000
16 programs, All On, Speed Control,
Sound-activated
MEGA STROBE
CH-750
750-WATTstrobe
Speed Control,
TECHNO STROBE 2000
CH-2000
75-watt strobe
Colored gel caps available
Speed Control
MINI FLASH
CH-730
35-watt strobe
Speed Control
EGG STROBE
CH-766
35-watt strobe
Speed Control
CURTAINE
STROBE
CH-765
Random Flashes
MONO CABLE
EST-10 MONO
33ft linking cable
EST-EXT-10 MONO
Extension cable also available