


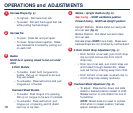

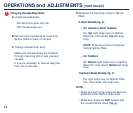

OPERATIONS and ADJUSTMENTS
10
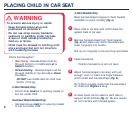
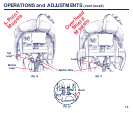
Recline / Upright Positions (fig. b):
Rear-facing - MUST use Recline position.
Forward-facing - MUST use Upright position
Upright Position: Rotate stand out and push
into car seat (fig. b).
Recline Position: Pull stand out and rotate
into car seat.
Harness straps MUST move freely. Make sure
harness straps are not pinched by recline stand.
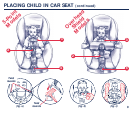
5-Point Crotch Strap Adjustment (fig. c):
• From bottom of car seat, pull crotch strap
clip out and remove clip from crotch
strap loop.
• From top of car seat, pull crotch strap out
and thread through desired slot. Make
sure red button is facing away from child.
• From bottom of car seat, re-attach clip to
crotch strap loop exactly as shown.
Overhead Shield Adjustment (fig. d):
• To adjust: Press button down and slide
shield to desired position closest to child.
Release button to lock shield into one of
5 positions.
NOTE: Shield does not need to contact
child when in closest position; harness
system restrains child.
Harness Straps (fig. a):
• To tighten: Pull lower belt tab.
• To loosen: Pull and hold upper belt tab
while pulling harness straps.
Harness Tie:
• To open: Press tab and pull apart.
• To close: Snap halves together. Make
sure harness tie is locked by pulling out
on each half.
Buckle:
MUST be in opening closest to but not under
child.
5-Point Models
• To buckle: Insert both tongues into
buckle. Pull up on tongues to be sure
they are locked.
• To unbuckle: Press red button and pull
tongues out of buckle.
Overhead Shield Models
• To buckle: Push tongue into opening.
Pull up on tongue to be sure it is locked.
• To unbuckle: Press red button, pull
tongue out of opening and lift shield
over top of car seat.
1
2
4
3
5
6