


12. RECLINING SEAT:
WARNING: Set parking brake before making any seat adjustments.
To partially recline the seat, rotate the ladder lock buckles forward thus releasing the
reclining straps. (Fig 20)
To fully recline the seat, unfasten side release buckles at seat back. (Fig. 21)
WARNING: When seat is fully reclined, (Fig. 21) backward tip-over is more likely,
and may result in an accident or injury, as seat and/or passenger may contact
ground before handlebar.
Conditions that make backward tip-over more likely to occur:
.
Heavier and or taller passengers (closer to our maximum limits in this manual) make
backward tip-over more likely.
.
Adding weight to the seat back pocket (max weight 2 lbs. / 1 kg.).
.
Elevating the front wheel. Be careful when going up curbs, steps or other obstacles.
.
Pushing down on handlebar.
.
Jogging and or running. Always jog or run with the seat in the fully upright position.
.
Hanging items from handlebar. Items should not be hung from handlebar when seat
is in fully reclined position.
.
Using the stroller on uneven terrain and inclines
.
To help prevent backward tip over, always hold handlebar.
To raise the seat to the fully upright position, fasten side release buckles and pull the
reclining strap loops. (Fig. 20 & 21).
For additional head clearance in fully upright and partially reclined positions:
Fold panel at top of seat down against seat back and attach Velcro.
Next, pull back on strap at top center of seat. Holding tension on strap, fold down and
connect Velcro on seat back. This strap tension will keep the top of seat (padded panel)
perpendicular to the seat back. (Fig. 20)
WARNING: Always jog with the stroller seat in the fully upright position. Jogging
with the seat in reclined positions may result in a loss of stability and injury.
13. WRIST SAFETY STRAP:
The wrist safety strap is designed to help prevent the stroller from rolling away should
you lose your grip on the stroller. When using the stroller make sure the strap is securely
looped over your wrist.
WARNING: Always use Wrist Safety Strap. Failure to use the Wrist Safetly Strap
can result in loss of control, injury and death.
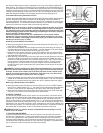
14. SHOCK ABSORBERS:
The suspension system features two shock positions to provide a comfortable ride for
kids of different weights. The two positions are shown in Fig. 2. Position 1 is intended
for total loads up to 50 lbs. (23 kg; total weight of occupants and cargo), while position
2 is intended for total loads from 50 to 100 lbs. (23 to 45 kg). The stroller features a
metal shock bracket with a sliding track and spring loaded shock pin that automatically
locks in place when it aligns with either of the two shock positions. Shock position
adjustments should be made with the stroller unloaded. The shocks will lock into position
1 when unfolding the stroller. To use the stiffer shock position, move the shock from
position 1 to position 2 by depressing the shock release button (Fig. 2) with one hand.
With the other hand, lift slightly and pull the shock backward. When the shock pin is
properly aligned in position 2, the pin will snap into place. Repeat this process for the
second shock. To move the shock from position 2 to position 1, reverse the above
process for both shocks.
15. FOLDING:
Remove children from stroller. Remove the contents of the Low Boy cargo pouch, seat
back and seat pockets. Unbuckle AFOD strap (Fig. 16.). Press both the right and left
handlebar release levers (Fig. 3), and fold the handlebar forward as shown in Fig. 22.
Locate the frame release handle (red foam) underneath the seat (Fig. 23) and pull
upwards sharply. This will allow the lower frame to fold together, as shown in Fig. 24.
The folded stroller can be made even more compact by removing the front and rear
wheels. The front wheel is removed by opening the front wheel quick release and
removing the wheel (see section 5). The rear wheels are removed by releasing the
parking brake (see section 8), and then opening the rear wheel quick release (Fig. 4),
and pulling each wheel directly to the side.
The Wrist Safety Strap can be used to keep the stroller in the folded position for transport
and storage. With the stroller folded, loop the end of the wrist safety strap around the
handlebar and back to the cross tube and fix the Velcro surfaces together (Fig. 25).
16. TIRE PRESSURE:
WARNING: Check tire pressure before every use.
Keep all tires inflated to 30 p.s.i.
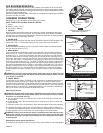
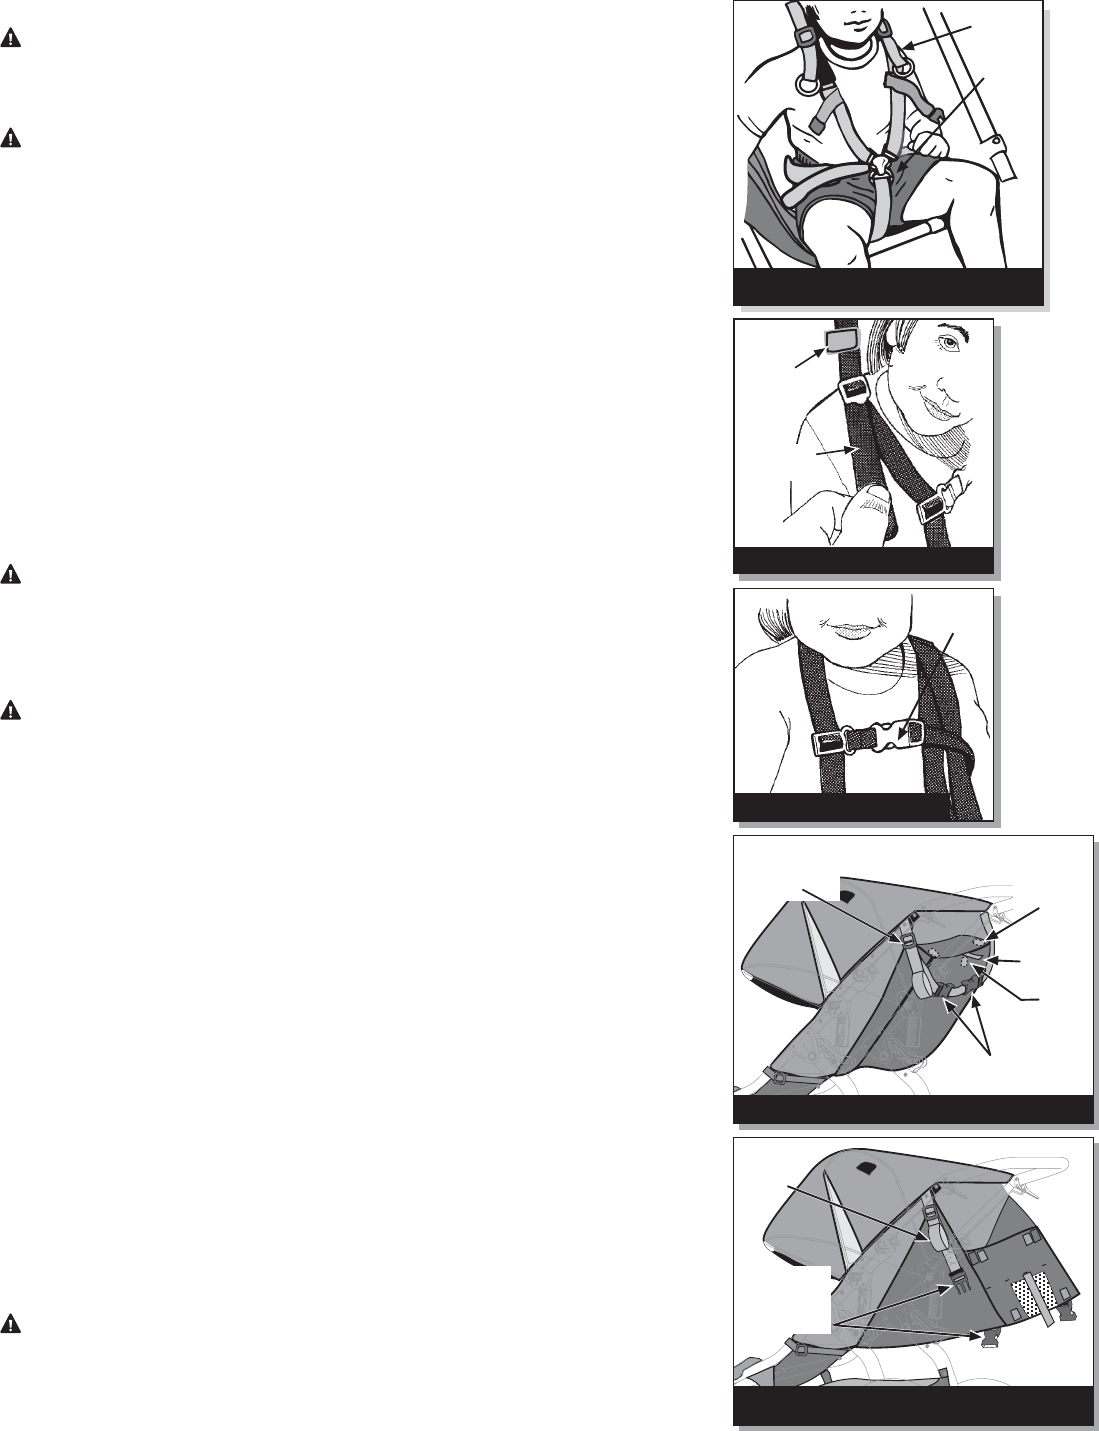
Fig. 19 Connect sternum strap.
Sternum
Strap
OMS07A P5
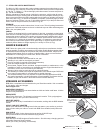
Fig. 18 Securely adjust shoulder straps.
Shoulder
Strap
Auxiliary
Harness
Anchor
Shoulder
Strap
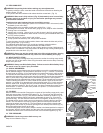
Crotch
Strap
Buckle
Fig. 17 Place straps over shoulders
and secure to buckle.
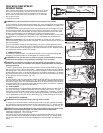
Fig. 20 Seat in fully upright position. (single seat shown)
Seat Reclining
Ladder Lock
Buckles
Additional head clearance:
Fold top panel,
connecting
Velcro
pieces.
Next,
Pull strap
and fasten
Velcro
Side Release
Buckles
(Fastened)
Reclining
Strap
Loops
Side
Release
Buckles
(Unfastened)
Fig. 21
Seat in fully reclined position.
(single seat shown)