


3
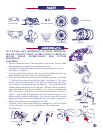
* The front fender is secured to the frame by the 5 screws provided. Examine the
bottom of the front fender. You will notice plastic tubes protruding from the
bottom (Fig 7A). These tubes must be lined up with the holes in the front frame
assembly (Fig 7B). Line up the front fender and press onto the front frame
assembly (Fig. 7C). Insert the 5 screws through the underside of the front frame
assembly into the front fender's plastic tubes (Fig. D). Tighten the screws only
until snug. Do Not over-tighten.
* Lean the stroller forward to rest on the front wheel. To attach the rear wheels,
push each wheel into the plastic corner fitting as shown in figure 8. Lift upward
on the plastic lever on the inside of the corner fitting as you push the axle into
corner fitting. When the wheel will not go on any farther, release the lever. Check
that the wheel has locked into the corner fitting by pulling on the wheel. If not
locked, lift upward on the lever, push the wheel on farther and release lever.
* Ensure that the wheels are firmly locked into place. Do Not use the stroller if the
wheels are not locked into place, but rather contact our customer service
department immediately at (800) 328-7363, between the hours of 8:00am and
4:30pm PCT, for assistance.
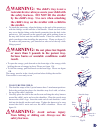
* Insert the tray clips into the female fittings on the stroller's fold joints: check that
the button on the bottom locks into place. See Fig. 8A
* To attach the front child tray, push the angled tray onto the post at the end of the
tray clip, while pressing downward on the snap button, until locked into place.
Please see figure 8B. Rotate the tray downward until latched onto the left tray
clip. Please check the the snap button comes through and securely latches the tray
in place. Please see figure 9.
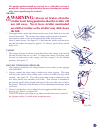
* To open the front child tray, press inward on left side tray release button and
rotate upward on the tray. Please see figure 10. Please note that you may remove
the tray completely by depressing the buttons on each side as shown in figure 11.
while pulling foward on the tray.
Fig 8a.
Fig 8b.
• The footrest is secured to the frame by the 4 screws provided. Line up the holes on
the plastic footrest with the holes on the frame to secure. See figure 8a. Line up the
front footrest and press onto the front frame assembly. Insert the 4 screws through
the underside of the front frame assembly into the front footrest's plastic tubes.
Tighten the screws only until snug. See figure 8b.
Do Not over-tighten.
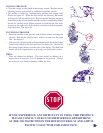
* The front fender is secured to the frame by the 5 screws provided. Examine the
bottom of the front fender. You will notice plastic tubes protruding from the
bottom (Fig 7A). These tubes must be lined up with the holes in the front frame
assembly (Fig 7B). Line up the front fender and press onto the front frame
assembly (Fig. 7C). Insert the 5 screws through the underside of the front frame
assembly into the front fender's plastic tubes (Fig. D). Tighten the screws only
until snug. Do Not over-tighten.
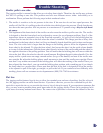
* Lean the stroller forward to rest on the front wheel. To attach the rear wheels,
push each wheel into the plastic corner fitting as shown in figure 8. Lift upward
on the plastic lever on the inside of the corner fitting as you push the axle into
corner fitting. When the wheel will not go on any farther, release the lever. Check
that the wheel has locked into the corner fitting by pulling on the wheel. If not
locked, lift upward on the lever, push the wheel on farther and release lever.
* Ensure that the wheels are firmly locked into place. Do Not use the stroller if the
wheels are not locked into place, but rather contact our customer service
department immediately at (800) 328-7363, between the hours of 8:00am and
4:30pm PCT, for assistance.
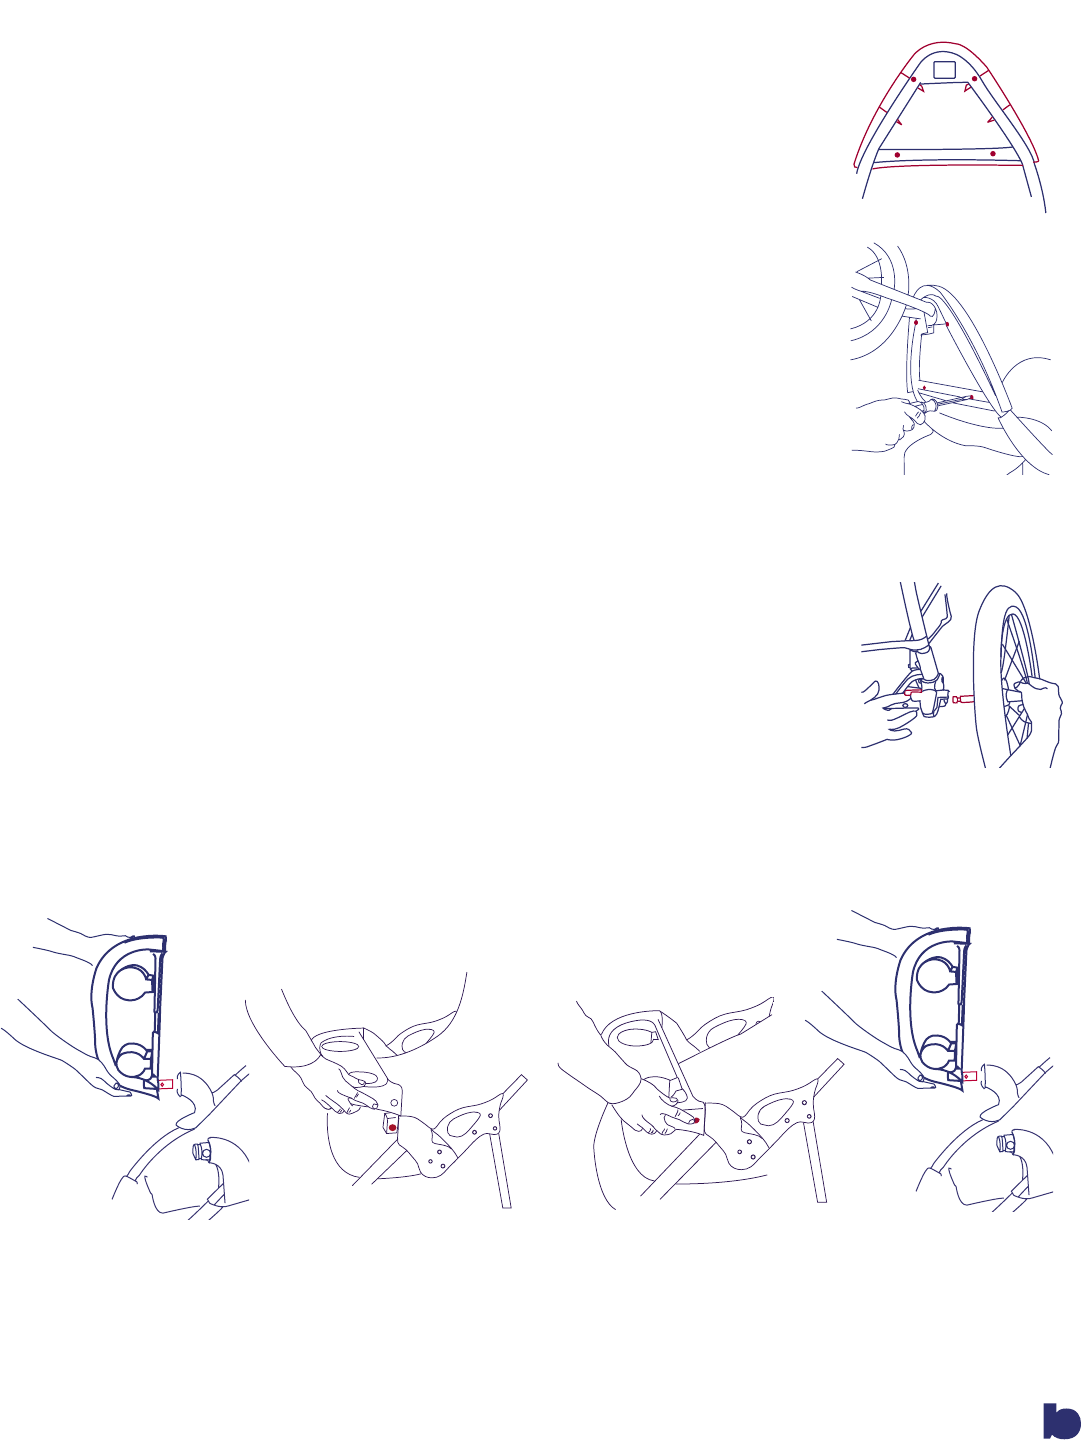
* Insert the tray clips into the female fittings on the stroller's fold joints: check that
the button on the bottom locks into place. See Fig. 8A
* To attach the front child tray, push the angled tray onto the post at the end of the
tray clip, while pressing downward on the snap button, until locked into place.
Please see figure 8B. Rotate the tray downward until latched onto the left tray
clip. Please check the the snap button comes through and securely latches the tray
in place. Please see figure 9.
* To open the front child tray, press inward on left side tray release button and
rotate upward on the tray. Please see figure 10. Please note that you may remove
the tray completely by depressing the buttons on each side as shown in figure 11.
while pulling foward on the tray.
Fig 9.
Fig 11.
Fig 10B.
Fig 10A.
9
10
10A.
10B.
Fig 10.
Please note that you may remove
the tray completely by depressing the button under the arm as shown in figure
11. while pulling forward on the tray.