


of the tray with a small object such as a closed ballpoint pen.
Simultaneously pull outward on the tray until removed. See
gure 4. Insert the fabric crotch pad into the slot on the child
tray and snap together. See gure 4a.
6. To attach the parent tray, position the tray so that the warning
statement on the inside can be read from the normal position
of pushing the stroller. Push the tray male end ttings into
the plastic female ttings on the inside of the stroller handle.
Check that the tray is securely latched in place. Please see gure
5. To remove parent tray, pull upward on the tray.
WARNING: Do not place hot
liquids in the parent tray. Hot liquids
can burn your child. Do not place more
than 3 pounds in the tray as it may cause
a hazardous unstable condition to exist.
TO UNFOLD STROLLER
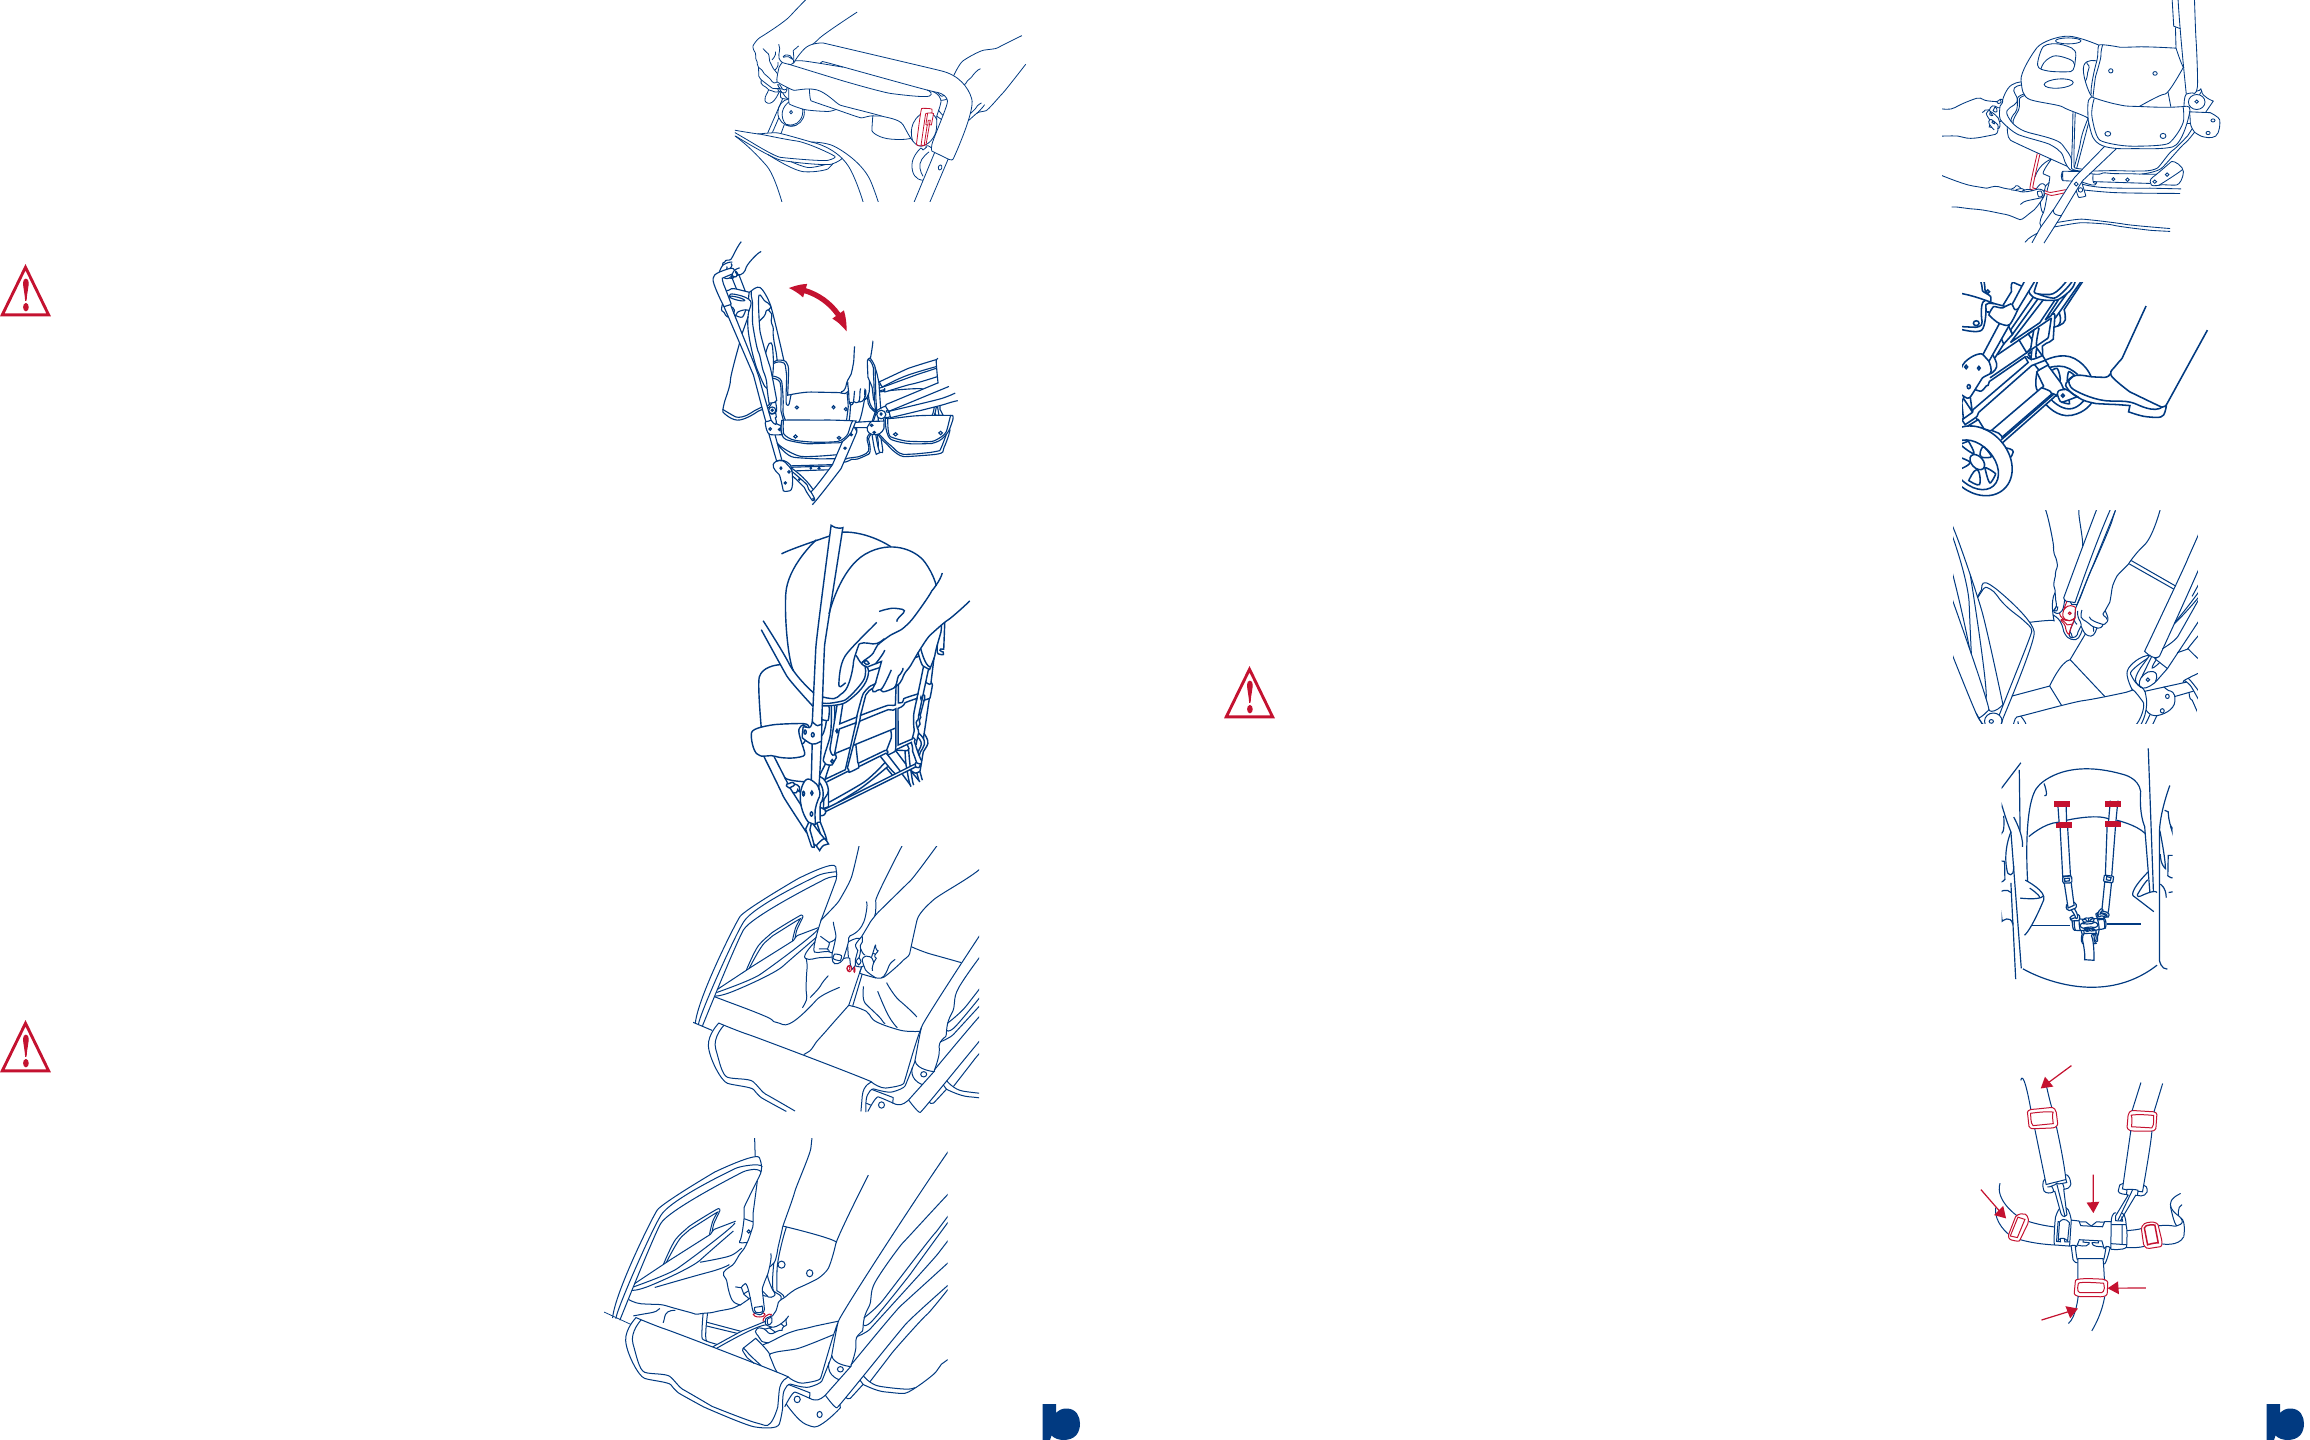
1. Disengage the side locking latch located near the top of the
stroller handle on the right side. Please see gure 16.
2. Place one hand on the handlebar and one hand on the front child
tray and push your hands apart until the stroller is unfolded and
locked. Please see gure 6. The stroller will lock into the open
position automatically. Please check that the stroller has locked
open before placing your children in the stroller.
3. Pull the canopies forward until fully open. The rear seat canopy
must be snapped to the back of the rear seat, on both the left and
right sides.
SEATBACK POSITIONING
The front and middle seats have a 2-position adjustment. The rear
seat has a 3-position adjustment: upright, semi-recline and reclined.
To adjust the recline of any seat, pull up on the release wire until
the latch is released and place the seat back in the desired position.
Ensure that seat back is locked. See gure 7.
WARNING: Child may slip into
leg openings and strangle. Never use
the rear seat’s fully reclined position
unless you close the footrest opening
as follows:
1. Remove the boot from the rear pouch located on the back
of the middle seat.
2. Snap the sides of the boot to the outside of the side panels
of the rear seat. See gure 8a.
3. Snap the boot to the underside of the seat pad of the rear
seat. See gure 8b. Please ensure that when completed
the footrest area is completely closed off.
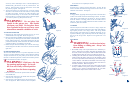
FOOTRESTS
Footrests have 2 positions: lowered and raised. To raise, lift the
footrest and hook the underneath support bar into the hooks on the
underside of the footrest. See gure 9.
BRAKES
To engage brakes, apply light downward pressure to the brake lever
located on the insides of both the left and right wheels. To release,
gently lift up on the brake lever. See gure 10. Always set brakes
when the stroller is not being pushed so that the stroller will not
roll away. Never leave stroller unattended on a hill or incline as the
stroller may slide down the hill.
CANOPIES
All three canopies are removable. To remove a canopy, depress the
retainer clip located on the inside of the canopy base while applying
light upward pressure to the canopy frame. The canopy should
slide out easily if the retainer clip is completely depressed. If you
experience difculty, apply increased pressure on the retaining clip
and not on the canopy frame. Repeat for the opposite side. See
gure 11.
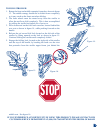
SEAT BELTS
WARNING: Avoid serious injury
from falling or sliding out. Always use
the seat belts.
1 The shoulder straps of the 5-point harness has 2 attachment po-
sitions. Select the loop position that places the shoulder strap
level with, or below the top of the child’s shoulder and feed the
shoulder harness under the correct loop. Please see gure11a.
2. Carefully place the child in the stroller seat and bring the safety
harness around the child’s waist and over the shoulders. Place
the crotch strap and between the child’s legs. Insert the male end
of each shoulder / waist belt into the buckle on the crotch strap.
Tighten the harness to be snug around the child’s waist and over
the child’s shoulders. Please see gure 12.
3. To release, apply pressure to both sides of each male clip until
the clip is released. This process requires a moderate amount
of effort so as to prevent an accidental release by your child.
NOTE: Buckles may be hard to release when 1st used.
4
Figure 5.
Figure 6.
Figure 7.
Figure 9.
Figure 10.
5
Figure 11.
Figure 8a.
Figure 8b.
Figure 12.
Shoulder Strap
Squeeze
Crotch Strap
Waist
Strap
Adjust for a
snug fit
Figure 12.