3
USAGE
TO ENSURE SAFE OPERATION OF YOUR BACKPACK, PLEASE FOLLOW THESE INSTRUCTIONS
CAREFULLY. RETAIN THESE INSTRUCTIONS FOR FUTURE REFERENCE.
Fig. 5
Fig. 1
Fig. 2
Fig. 3
Fig. 4
Fig. 6
Fig. 7
ASSEMBLY
* Remove Backpack from box. The Backpack comes fully assembled and
ready to use, except for canopy.
UNFOLDING BACKPACK
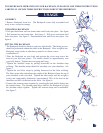
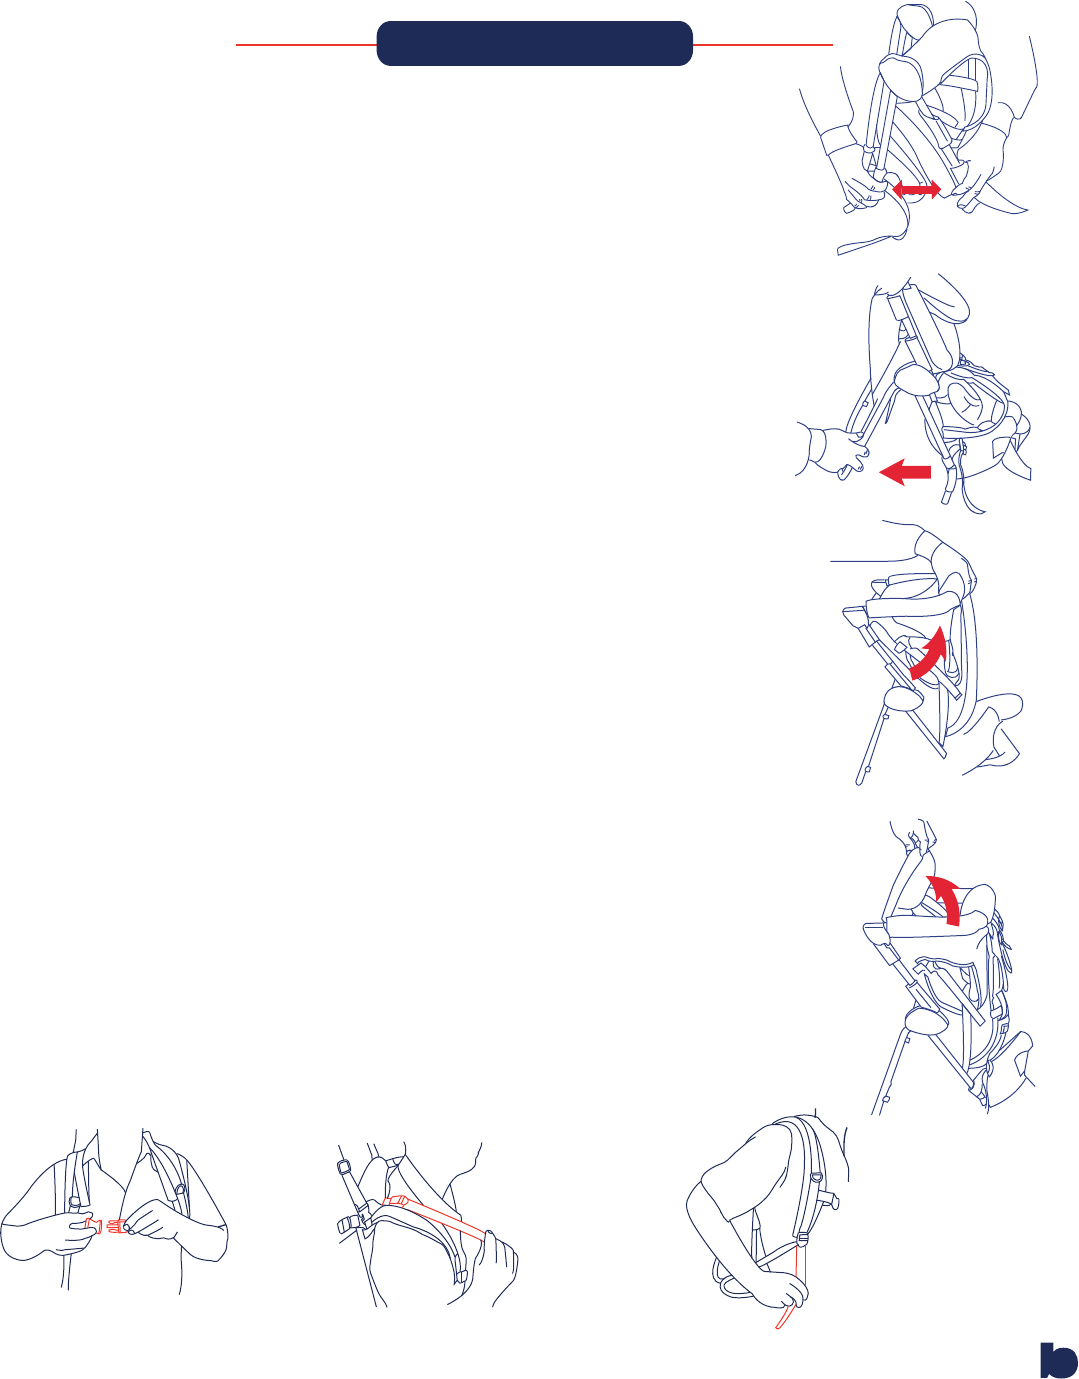
* Pull apart both front and rear frame tubes until locks into place. See figure
1. Pull outward on rear frame tube. See figure 2. Pull up on seat frame until
locks into place. See figure 3. Push headrest back until locks into place. See
figure 4.
FITTING THE BACKPACK
* The Backpack should be fitted to each user individually. The fitting process
should be performed without the child in the Backpack. Place weight in the
Backpack, using books or other heavy material, to obtain a more
comfortable fit.
* Place the Backpack on your back and position the waist strap across the
front of your hip bone points. The buckle should be approximately over
your belly button. Tighten the waist strap until snug.
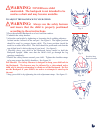
* Tighten the shoulder straps by pulling downward on the shoulder strap
webbing. The shoulder straps should lie smoothly over your shoulders. See
figure 5.
* Tighten the load lifter straps by pulling downward on the lifter webbing.
The lifter straps help redistribute the weight of the Backpack from the top of
your shoulders to the waist belt. Tighten the lifter straps until the weight is
evenly and comfortably distributed, approximately 20% of the load on the
shoulders and 80% of the load on the waist. See figure 6.
* Connect the sternum straps together by inserting the male buckle fitting into
the female fitting. The sternum strap helps stabilize the Backpack by tying
the shoulder straps together. Tighten the sternum strap until comfortable.
See figure 7.


