


MX49/MX61 Owner’s Manual
Quick Guide
37
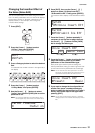
6 If you’ve set “Type” to “Performance” in step
5, select the desired Performance number,
then press [ENTER].
If you’ve set “Type” to something other than
“Performance” in step 5, go on to step 8.
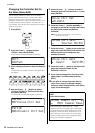
7 Select the destination Performance number
(for loading), then press [ENTER].
8 Press [INC/YES].
The data is loaded from the USB flash memory. To
cancel the Load operation, press [EXIT] while the
“Now loading...” message is still displayed.
9 Press [EXIT] repeatedly if necessary to exit
from the File display.
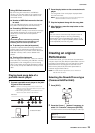
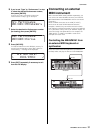
Connecting an external
MIDI instrument
With a standard MIDI cable (available separately), you
can connect an external MIDI instrument, and transmit
MIDI data between the MX49/MX61 and the connected
instrument.
Either the MIDI connectors or the USB [TO HOST]
terminal can be used for MIDI data transmission/
reception; however, they cannot be used at the same
time. Select the desired connector for use in the “MIDI IN/
OUT” parameter of the [UTILITY] Æ “02:MIDI” display. As
you work through the explanations in this chapter, set
“MIDI IN/OUT” to “MIDI” since MIDI is used as the
example connection here.
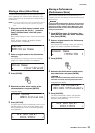
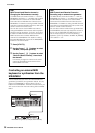
Controlling the MX49/MX61 from
an external MIDI keyboard or
synthesizer
Here, we’ll use an external keyboard or synthesizer to
remotely select and play the Voices of the MX49/MX61.
Src*Performance
001(A01):MXCategory
2
Dst*Performance
003(A03):Sirius
2
qw**Are*you*sure?***
e****[NO]/[YES]****r
MIDI [IN]
MIDI OUT
MX49/MX61
External MIDI keyboard (for example, an 88-key synthesizer)