


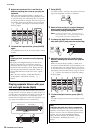


MX49/MX61 Owner’s Manual
Quick Guide
24
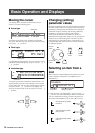
Keyboard Octave/
Transpose settings
Octave
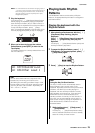
The OCTAVE [-]/[+] button lets you shift the pitch of the
keyboard in octaves, up to a maximum of three. For
example, you may want to shift the pitch down lower to
get extra bass notes, or shift up to get higher notes for
leads and solos. Pressing the [-] and the [+] buttons
together at the same time will return the setting to the
initial value (0).
The current octave range can be confirmed via the status
of the lamp of the OCTAVE [-]/[+] buttons. When set to
one octave down or up, the corresponding lamp lights.
When set to two octaves down or up, the corresponding
lamp flashes slowly. When set to three octaves down or
up, the corresponding lamp flashes quickly.
Transpose
The TRANSPOSE [-]/[+] button lets you shift the pitch of
the keyboard in semitones (up to 11 semitones). This
function allows you to play in the same position and with
the same fingering, even if the Song data or another
instrument player is playing in a different key. Pressing
the [-] and the [+] buttons together at the same time will
return the setting to the initial value (0). When set to one
semitone down or up, the corresponding lamp lights.
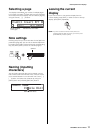
Storing the edited settings
When you are satisfied with the results, store the settings
you’ve made to internal memory (as a Performance) so
that they can be recalled after turning off the power.
Press [STORE], then press [ENTER]. Finally, press [INC/
YES] to store the settings to Performance 1.
NOTE For detailed instructions on the Store operation, see “Storing
the Performance” (page 33).
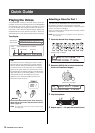
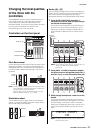
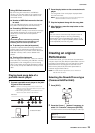
Playing the Performances
A program in which multiple Voices (parts) are combined
is referred to as a “Performance,” and the instrument has
a total of 128 Performances. A Performance consists of
up to 16 Parts. The Parts which you normally use for
playing the keyboard are Parts 1 and 2.
When turning on this instrument with the factory settings,
Performance 1 is called up. In the instructions covered so
far (pages 18 – 24), you’ve played and edited Parts 1 and
2 of Performance 1, which is simply designed for playing
one or two Voices. Performances 2 – 128 are provided for
enjoying a powerful and thick sound which consists of
multiple various Voices. In the instructions below, we’ll
change the Performance to one of Performances 2 – 128
and play it.
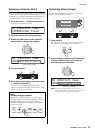
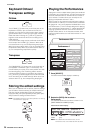
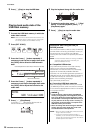
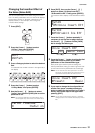
1 Press [SELECT].
The Performance Select display is called up.
2 Rotate the [DATA] dial to select a
Performance.
The selected Performance number is shown in the
[PERFORMANCE NUMBER] display.
NOTE For a detailed list of all Performances, see the
“Performance List” of the “Data List” PDF document.
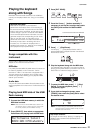
Performance 128
Performance 1
Normally used Parts
Part 1
Voice
Voice
Part 2
Part 3
Voice
Part 10
Voice
Part 16
Voice
Performance*Select
001(A01):MXCategory
c
Performance Select display
Performance
number
Performance
group
Performance name