


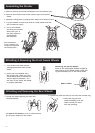


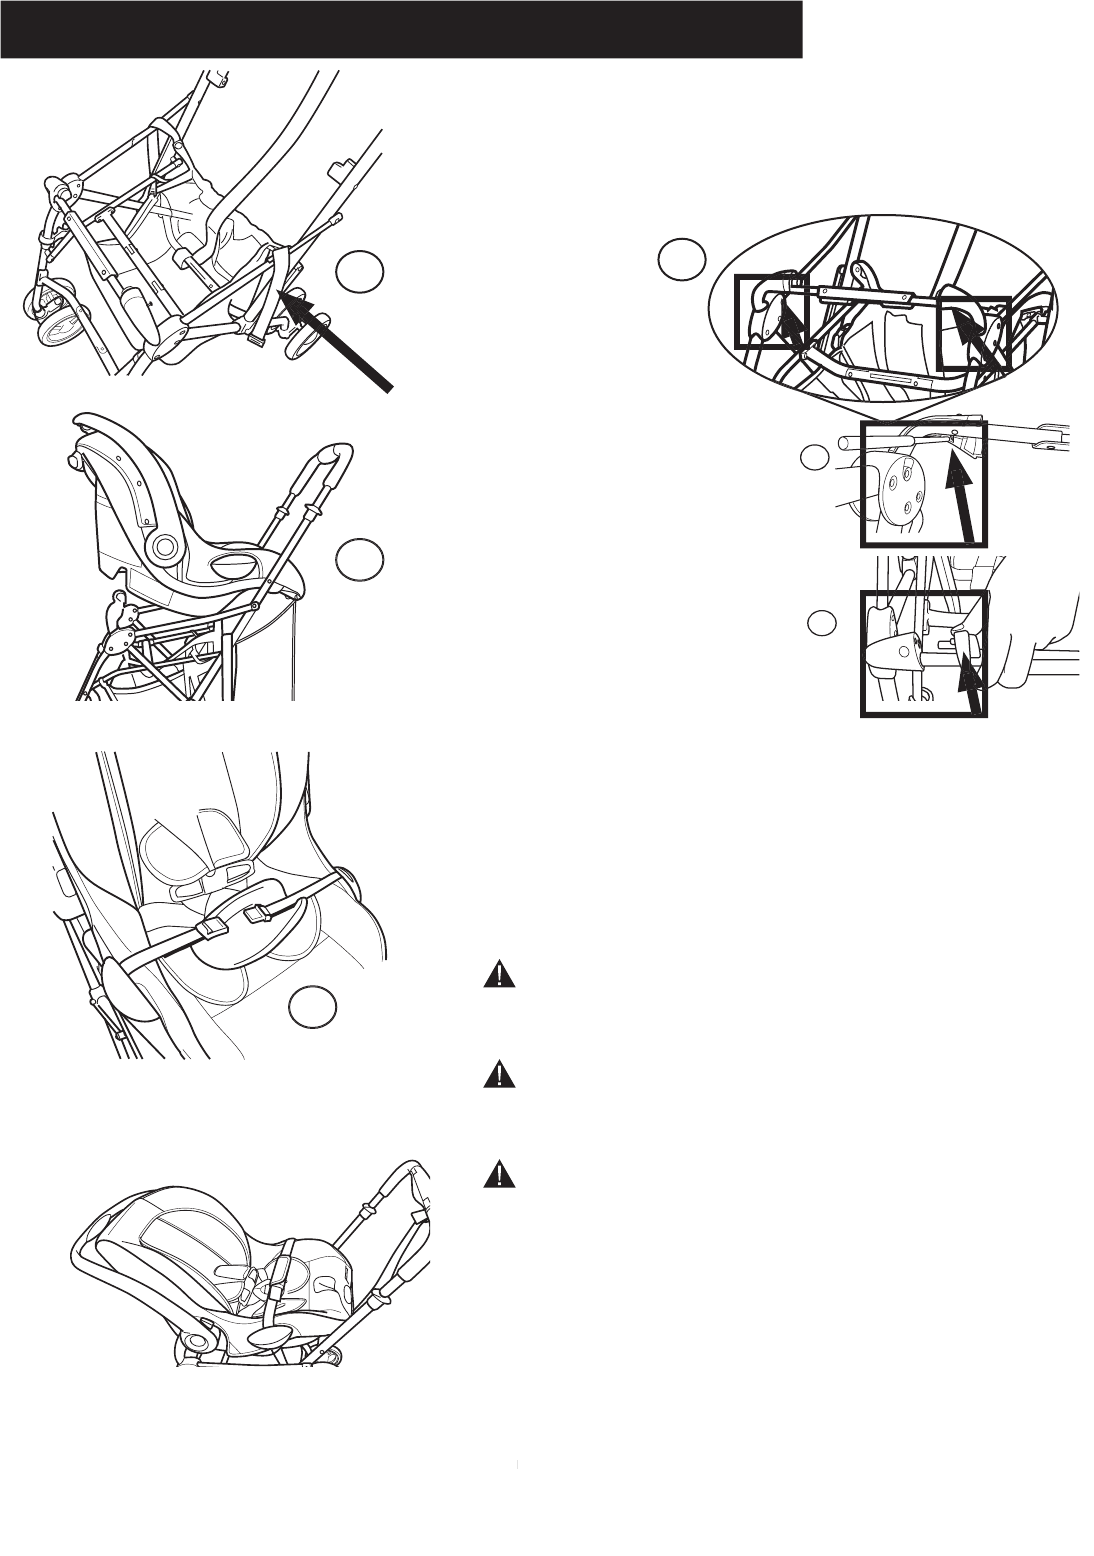
Attaching/Releasing Infant Seat
- 6 -
Trade name and trademarks of Graco
®
, Century
®
, Evenflo
®
and Cosco
®
and Cosco
®
®
and Peg-Perego are the property of their respective owners and no endorse-
®
and Peg-Perego are the property of their respective owners and no endorse-
®
ment of or approval by them is intended or implied. All
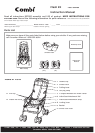
Combi Flash EX
strollers are compatible with specified models of the Graco
®
, Century
®
,
Evenflo
®,
and the
Peg-Perego
®
infant car seat/carrier models
®
infant car seat/carrier models
®
as of the date this printing was prepared.
Copyright May 2005 C
Copyright May 2005 C
ombi USA Inc.
2
.
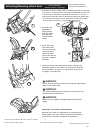
Unbuck
le the
attachment
strap and lay
over the right
and left side
of the stroller
f
rame.
3
.
Hook the infant
seat onto front
rail of the stroller.
The foot end of
infant
car seat/
carrier will rest on
the two L-shaped
brackets.
Cosco, Eddie Bauer,
Evenflo, Discovery, Peg-Perego
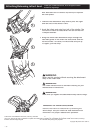
1
.
Use object to press in plastic tabs to release right and left end caps.
(See diagram A)
The plastic tabs are located underneath the front rail
of the stroller on the plastic right and left rail covers.
(See diagram 1)
Right and left end caps will be released by pressing in plastic tabs.
(See diagram B)
End caps must be removed to install Cosco Eddie
Bauer, Evenflo, Discovery or Peg-Perego
infant carrier.
Bauer, Evenflo, Discovery or Peg-Perego
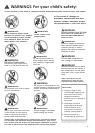
WARNING
Never
use this product without securing the
attachment
strap to the infant seat.
WARNING
The infant harness must be buckled correctly per your
manufacturer's instructions.
Note: Illustrations are
for
reference only and may not
represent the
actual product.
Remove End Cap
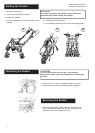
REMOVING THE
INFANT SEAT/CARRIER
Remove the infant car seat/carrier by reversing the
above steps.
See your infant car
seat manufactu
rer's
instruction
s for proper rel
ease lever operation.
3
.
Bring the infant seat attachment straps through the
seat belt guides in the infant car seat/carrier and fas-
ten the buckle. To loosen,
tilt the buckle and pull up.
To tighen, pull the strap.
1
1
2
3
2
WARNING
Make sure
you tighten the attachment strap before
u
s
a
ge.
B
A